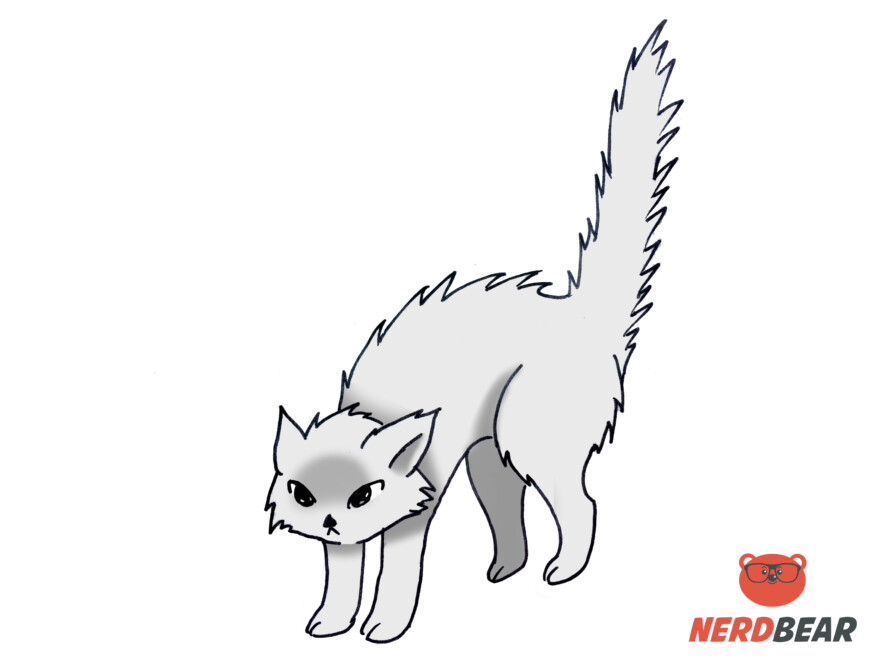
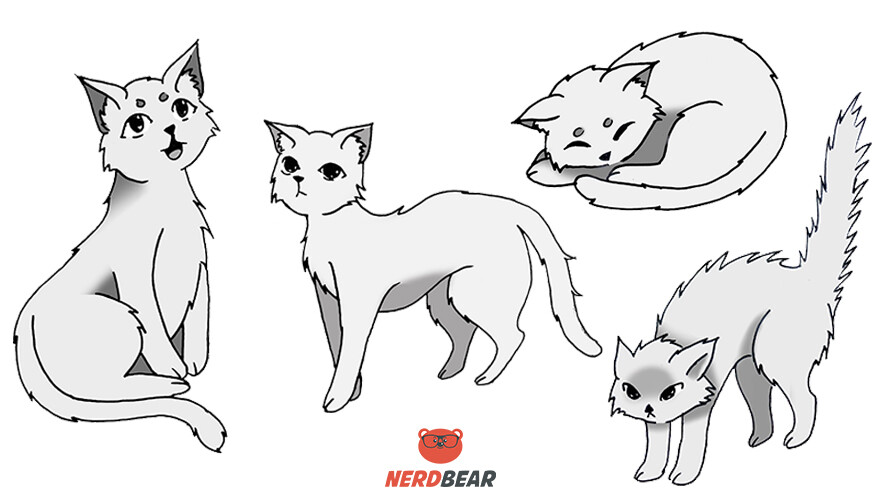
Cats are one of the most adorable creatures to draw. It might look daunting to draw at first but with these easy-to-follow step-by-step instructions, you will be able to create your own furry friend.
Quick Links
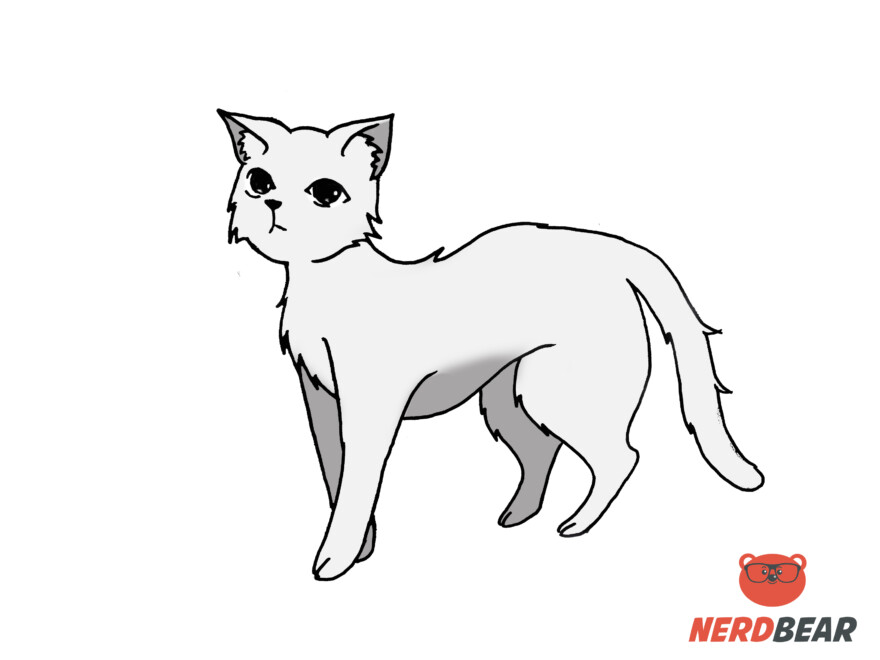
How To Draw a Standing Anime Cat
Step 1:
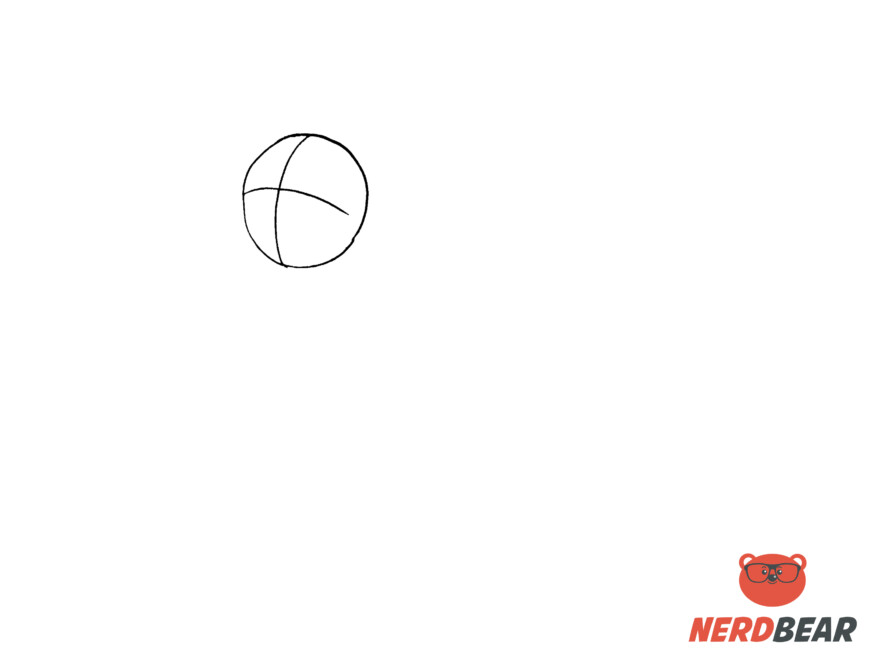
Start with a circle for the guideline of the cat’s head. Indicate where the cat will be facing by drawing a vertical and horizontal line. The horizontal line is for your cat’s eye line. The vertical line is to indicate where the middle of the face would be.
Step 2:
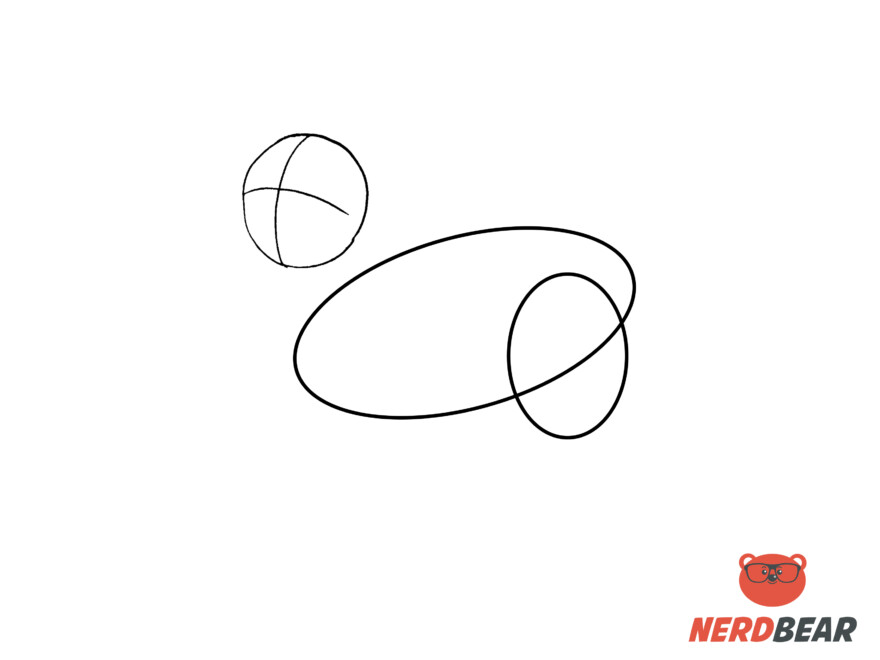
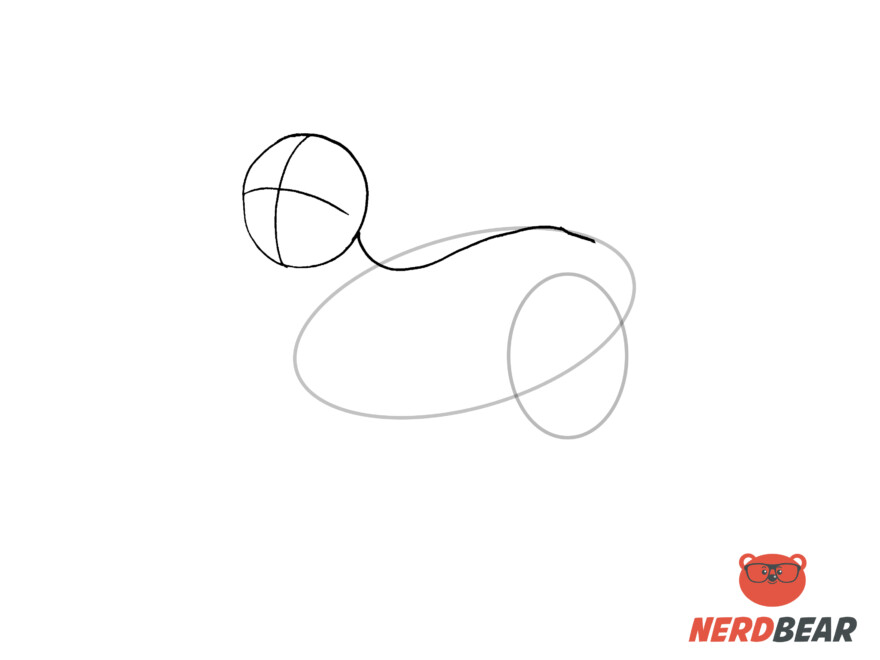
To create a guideline for the body of the cat, create two oval shapes. The smaller oval shape is a guide for the back leg of the cat.
Step 3:
Create the back line of the cat by curving down then up.
Step 4:
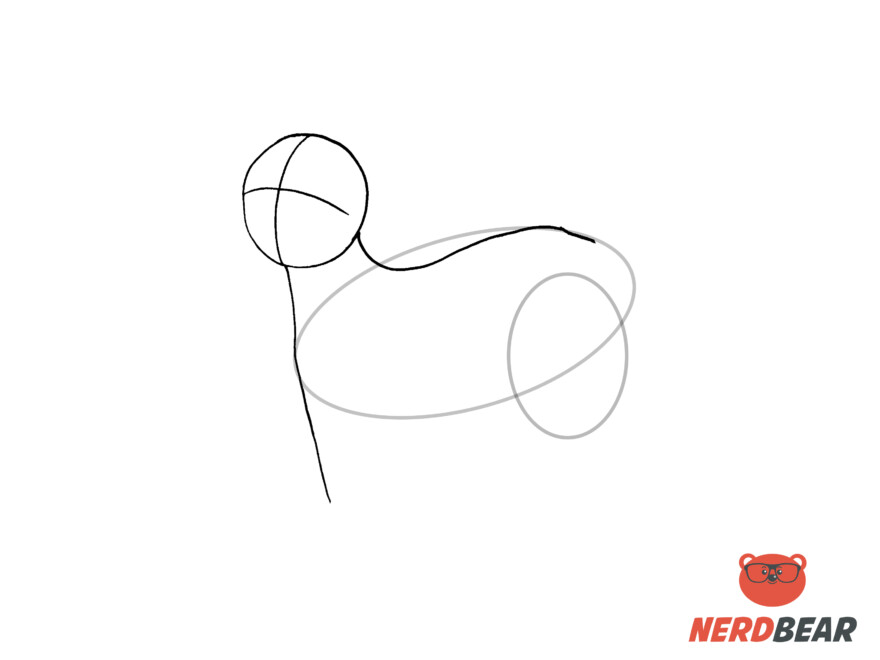
Finish the neck portion by drawing a straight line down from the cat’s head. Extend the line to serve as part of the cat’s front leg.
Step 5:
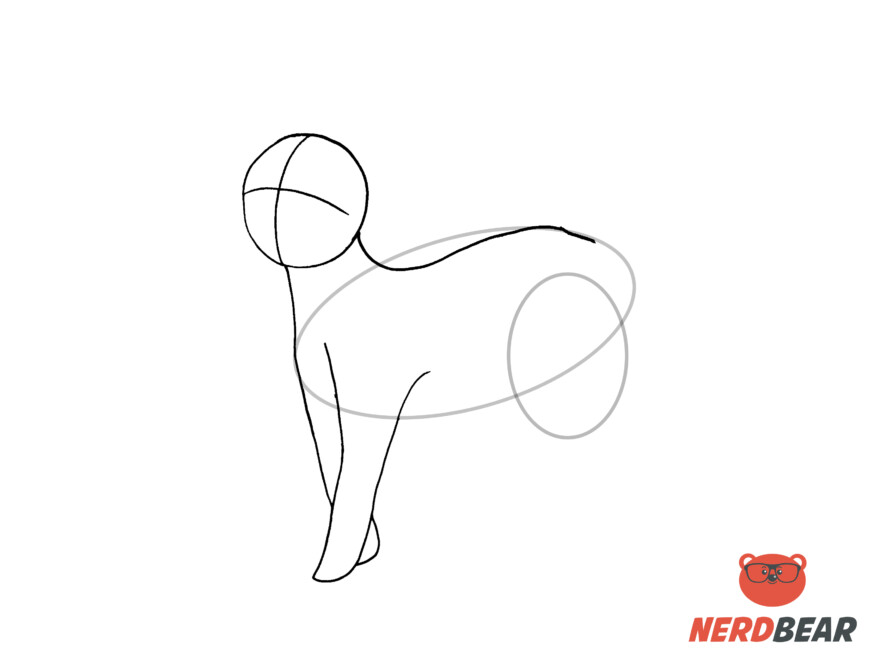
Draw a funnel shape for the cat’s front leg and curve the paws.
Step 6:
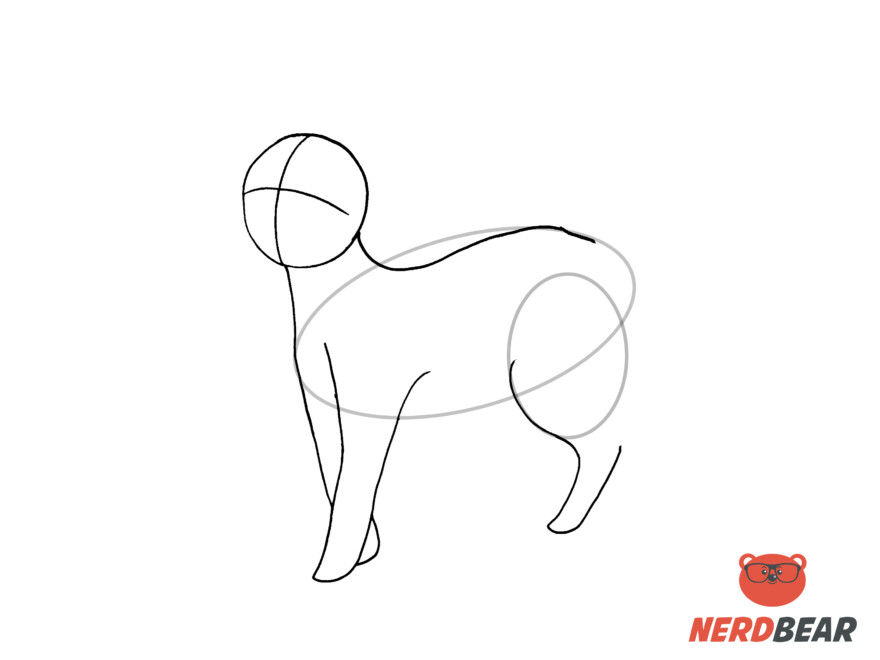
Using the guideline, start the cat’s back legs.
Step 7:
Finish up the back legs by curving inward then outward.
Step 8:
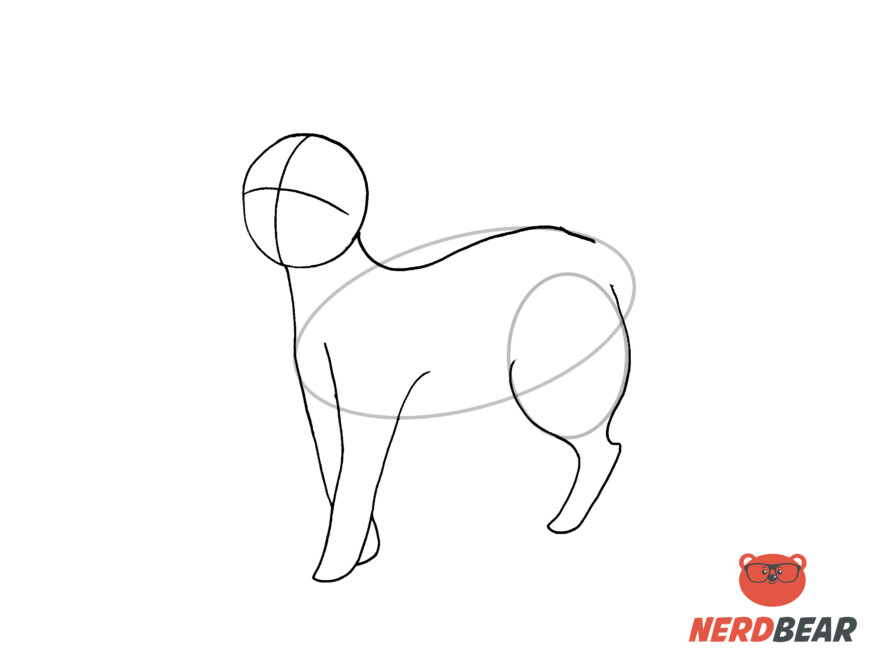
Create a curve line for the chest and belly part of the cat.
Step 9:
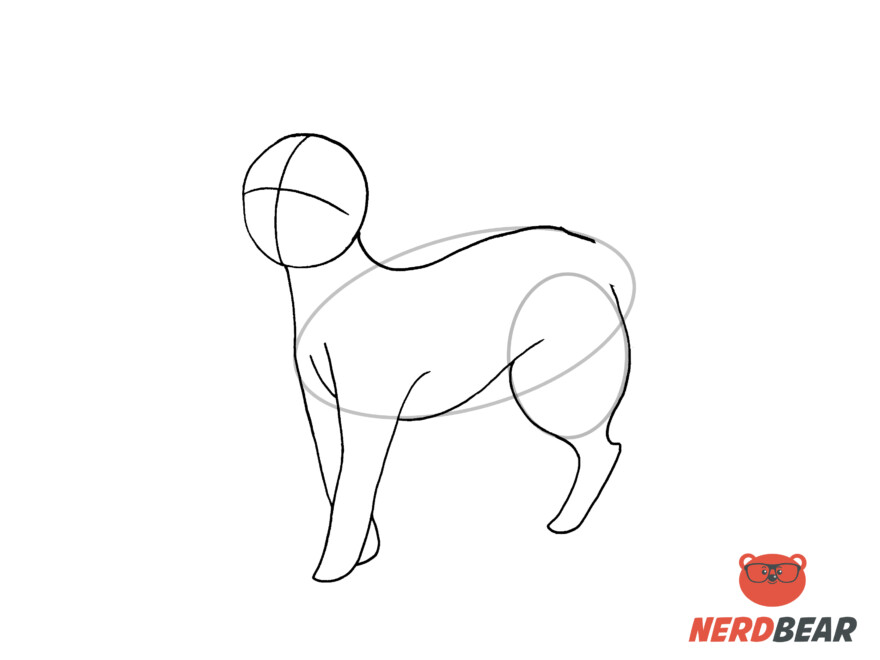
Add in the other back leg by mirroring the one you have already drawn.
Step 10:
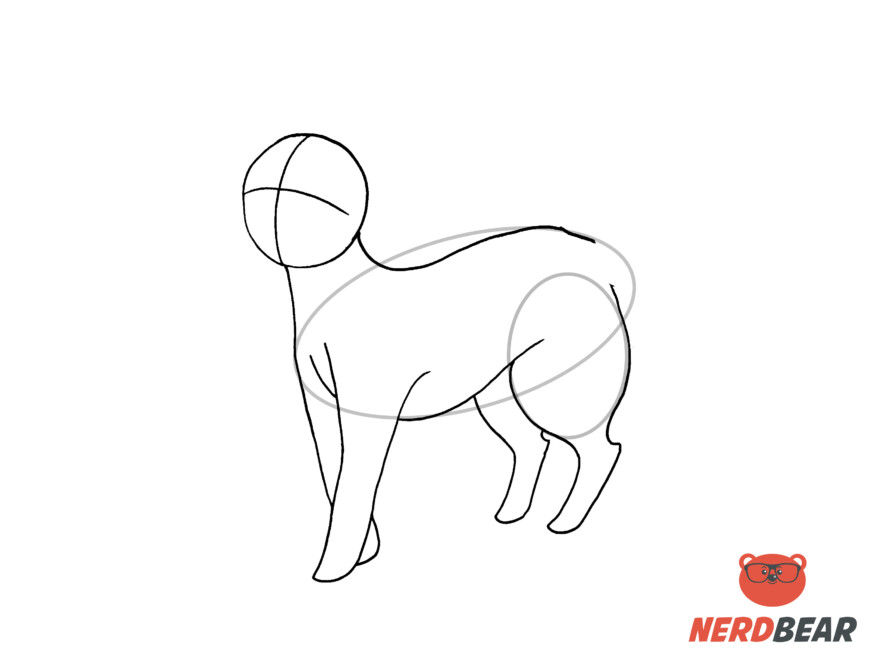
Draw in the cat’s tail.
Step 11:
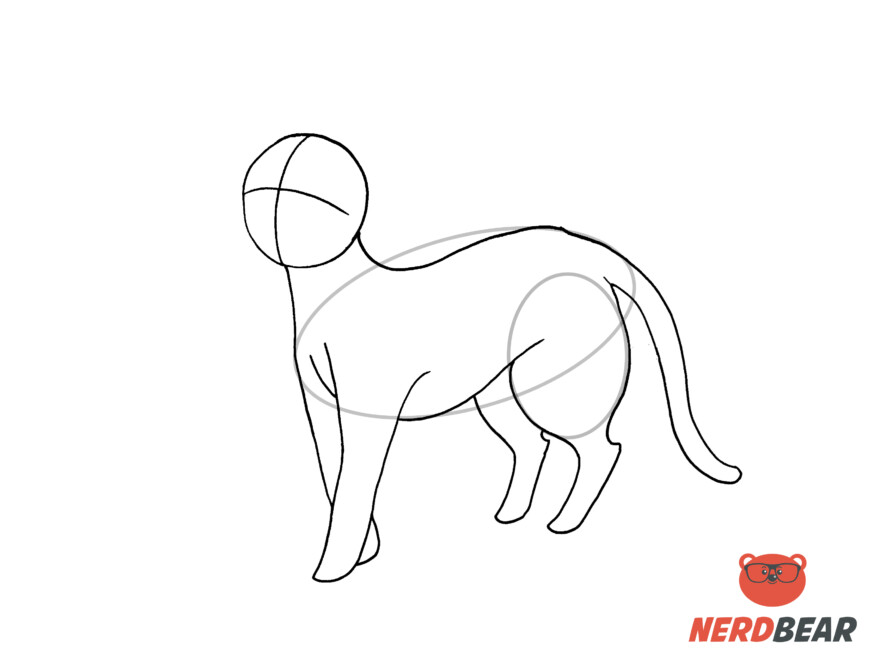
Draw fur clumps along the body of the cat. Focus mainly on the Chest, Back, and Tail portion. Slightly vary the length and size of the clumps to make it look more natural.
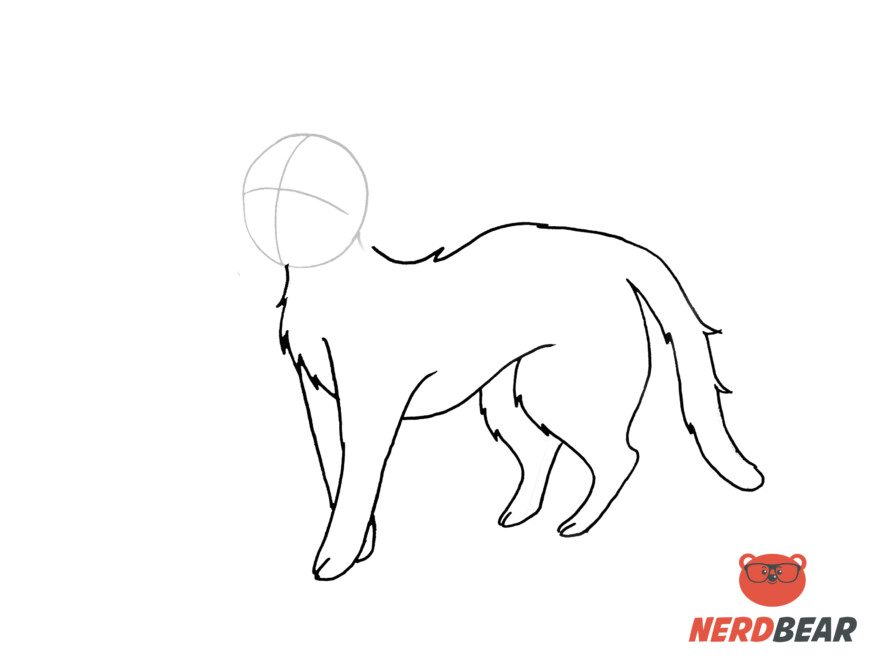
Step 12:
Draw in the ears of the cat.
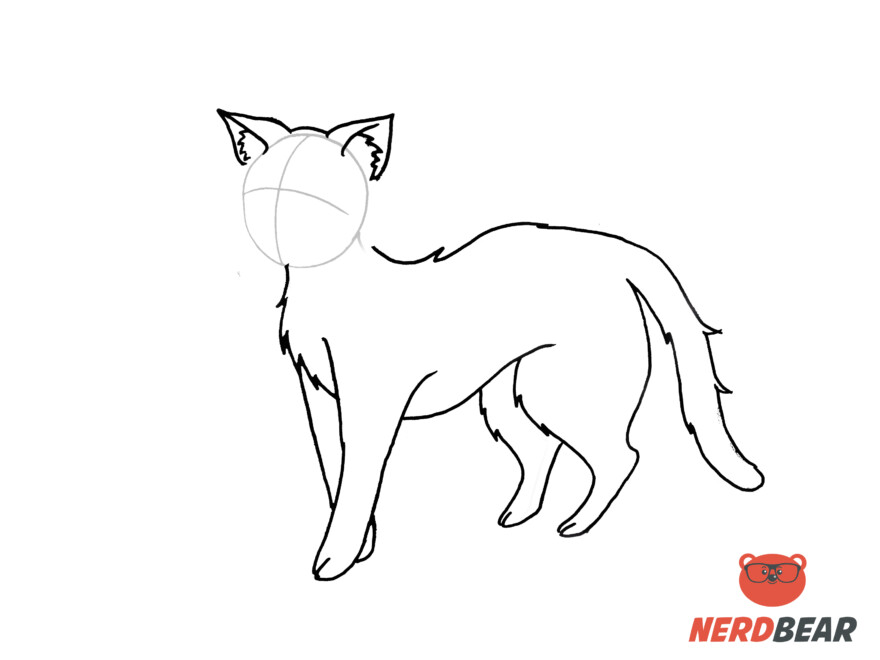
Step 13:
Finish the cat’s face by adding fur to the cheeks.
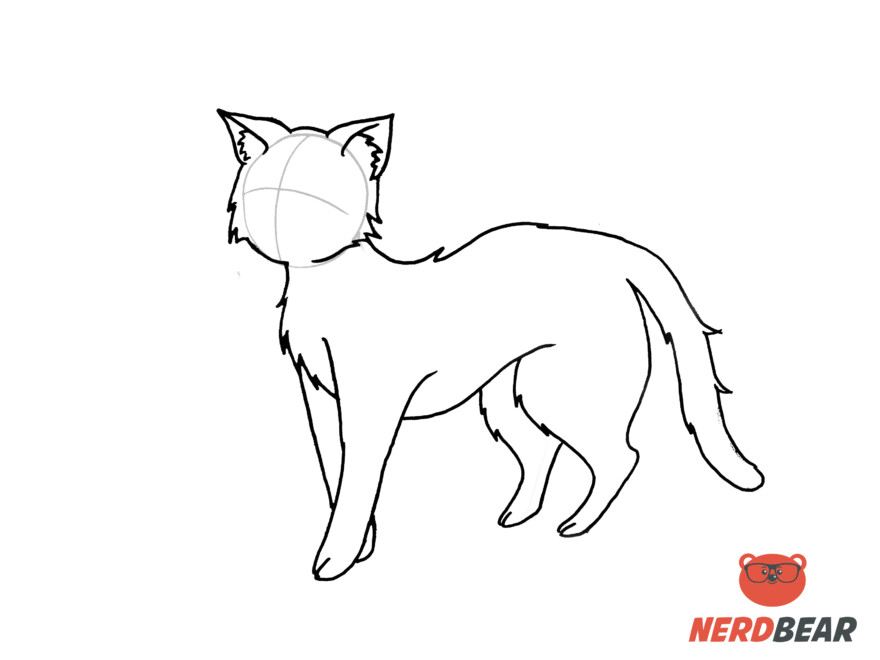
Step 14:
Add the cat’s facial features. Use the horizontal line as a guide for the cat’s eyes. Add the nose below the intersection of the two guides.
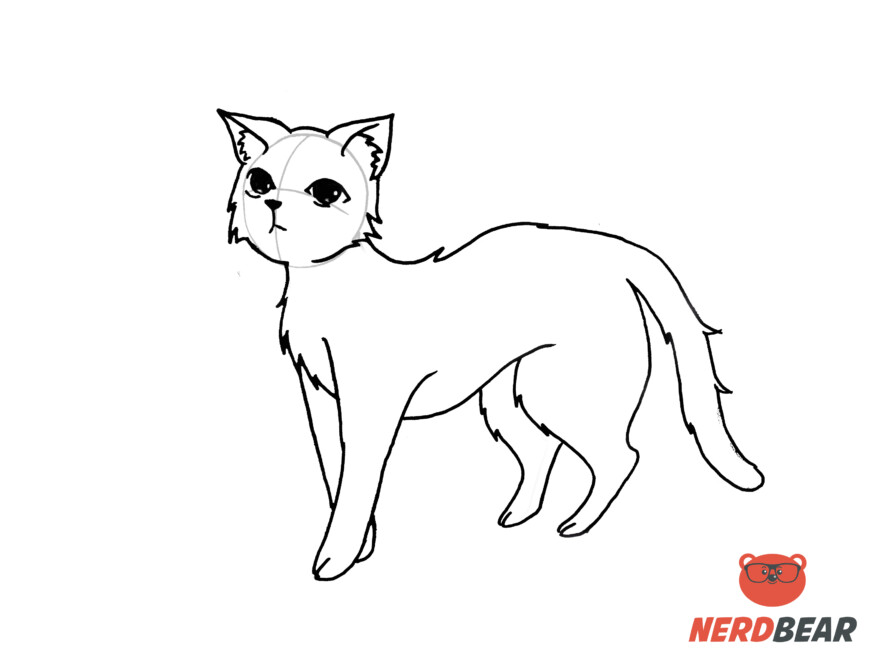
Step 15:
Finish the drawing and add the major shadows.
How To Draw a Sitting Anime Cat
Step 1:
Create a circle for the cat’s head. Draw a vertical line within the circle to indicate the middle of the cat’s face. Draw a horizontal line within the circle for the eye line guide.

Step 2:
Create a guideline for the body of the cat. Draw an oval shape just below the head. Draw a circle and overlap it to the oval you just added, this will serve as a guide for the back legs of the cat.
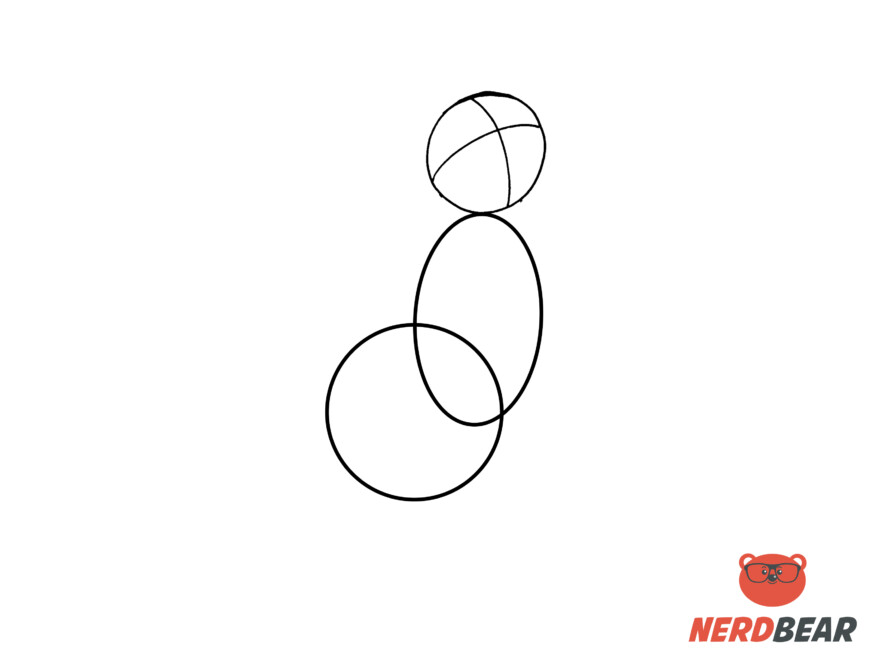
Step 3:
By following the guidelines, draw the neck and back of the cat.
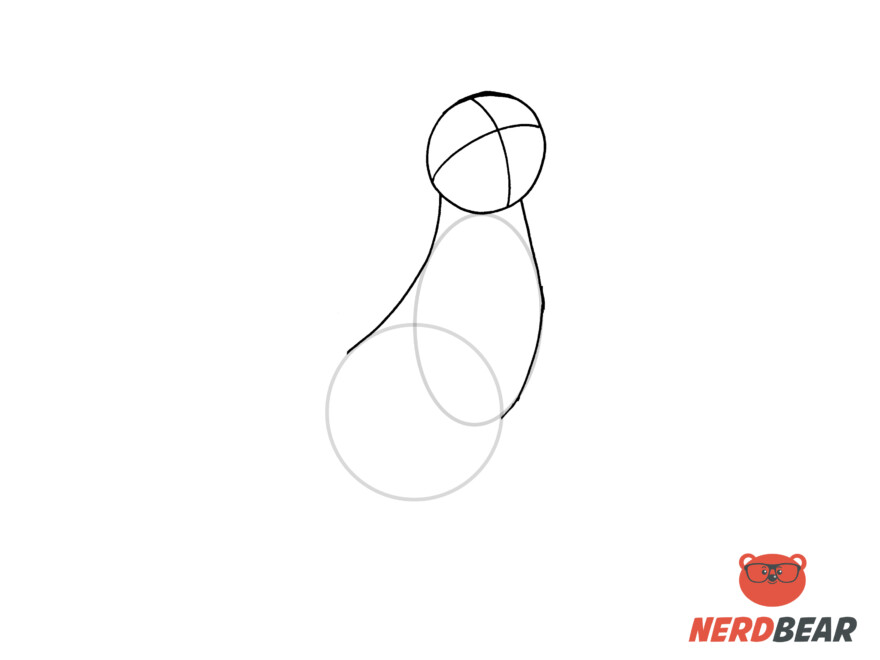
Step 4:
Draw in the back leg. Create a number 2 shape and round the paws. Draw a straight line then follow the guide to finish the leg.
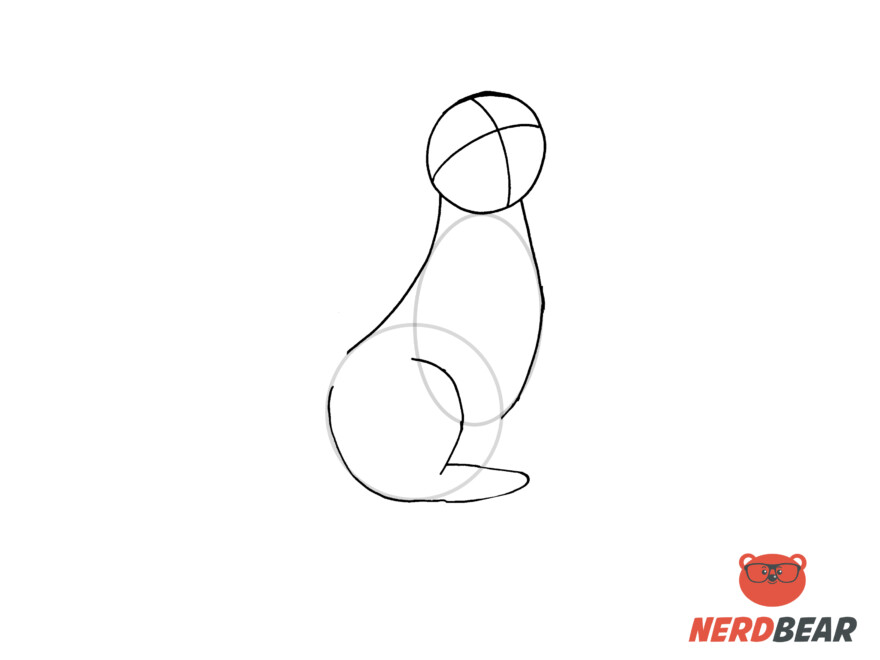
Step 5:
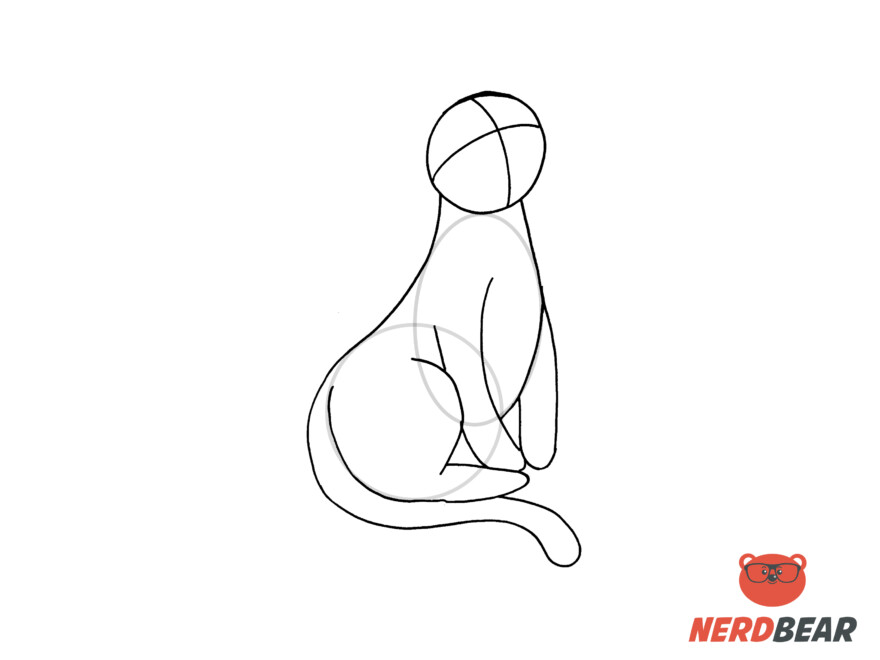
Add in both the front legs and draw in the tail of the cat.
Step 6:
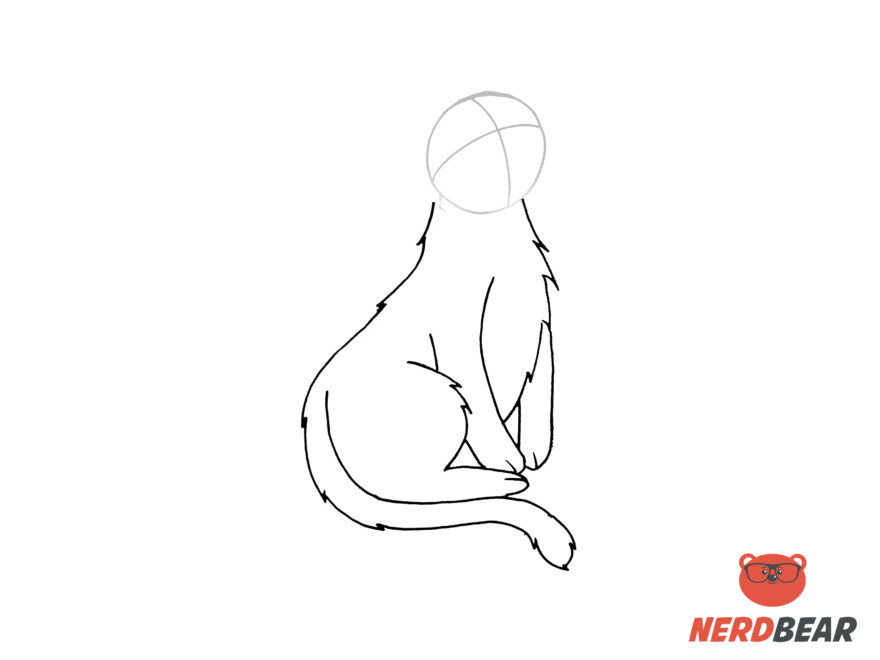
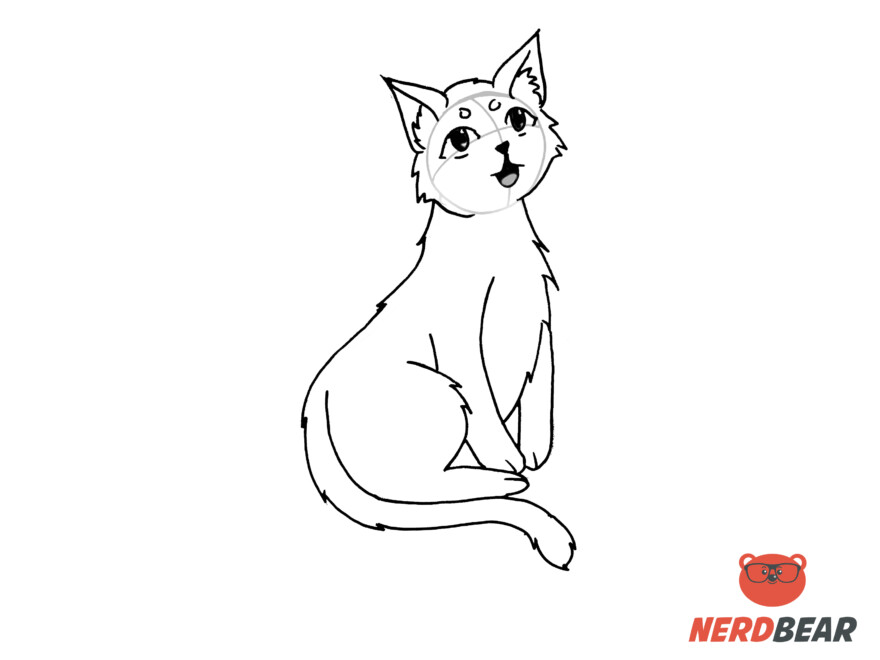
Add fur clumps on the neck, back, and tail of the cat. Vary the length and thickness of the clumps as you move along.
Step 7:
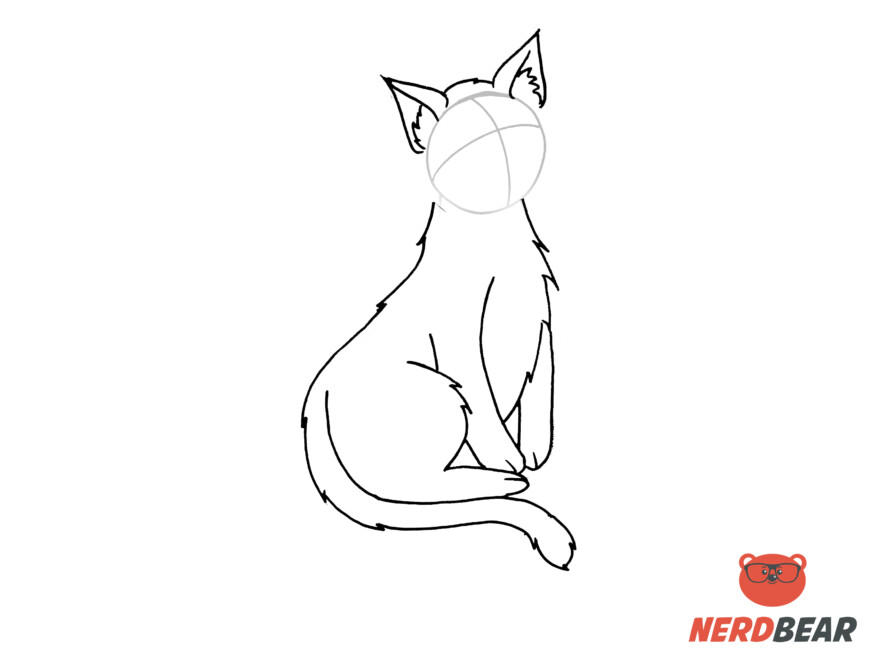
Create the cat’s ears on top of the head guideline. You can add hair clumps in the ears of the cat if desired.
Step 8:
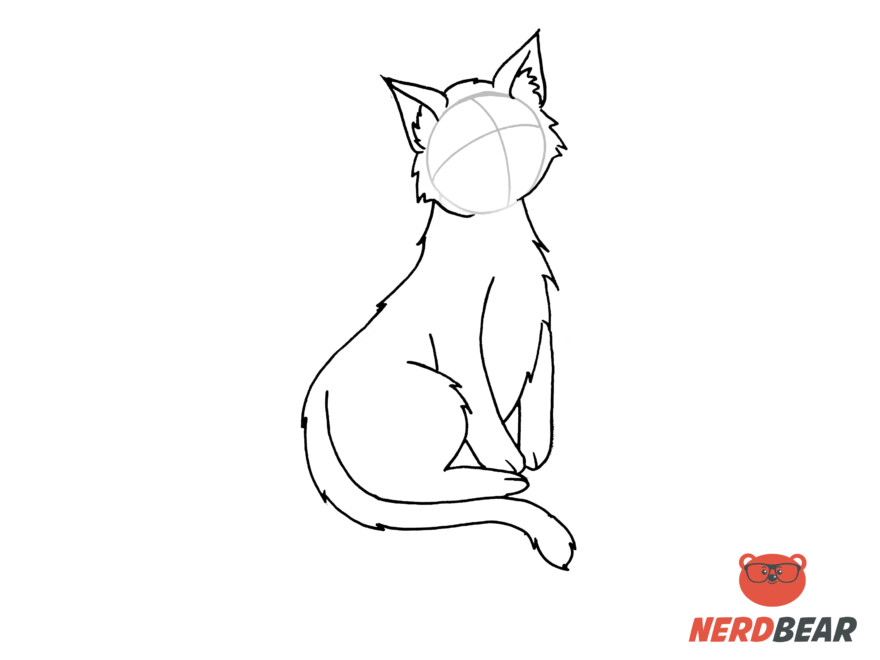
Add fur going outwards from the cheeks of the cat to finish the face shape.
Step 9:
Using the face guidelines, draw in the eyes, nose, and mouth. You can also add circular shapes above the eyes to serve as eyebrows.
Step 10:
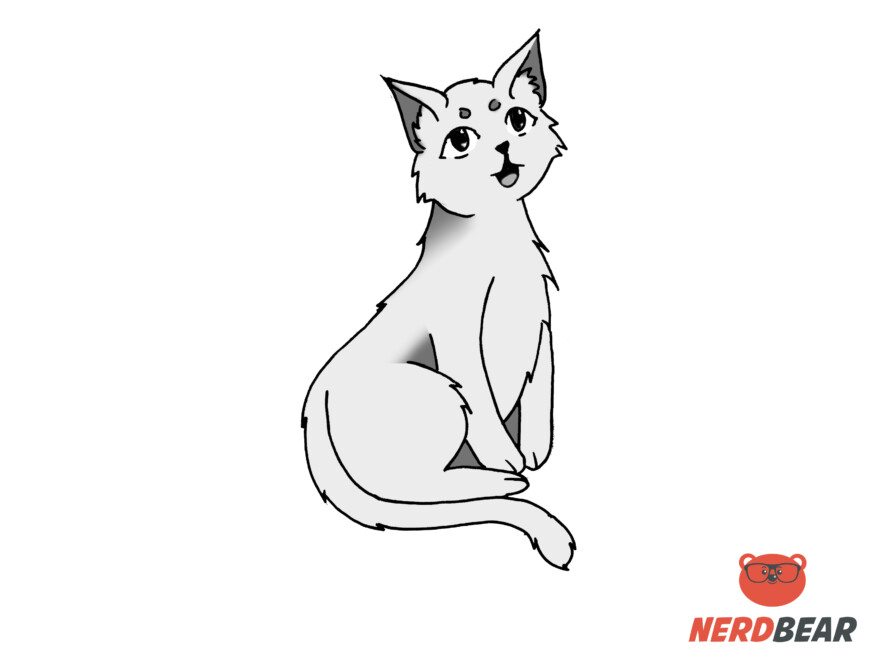
Finish up the drawing and add depth by shading the inner ear, back of the neck and the other parts of the cat that are covered.
How To Draw a Sleeping Anime Cat
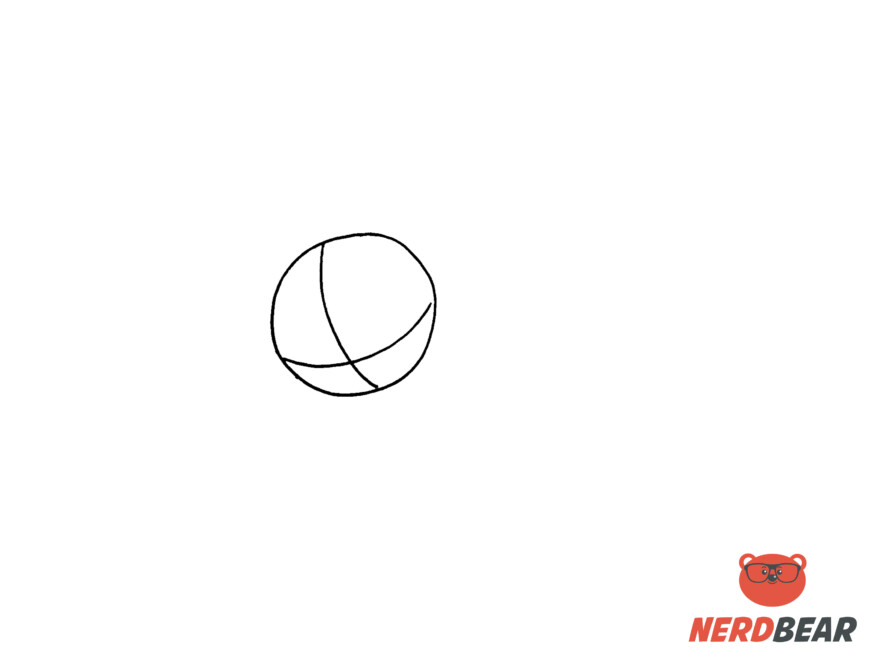
Step 1:
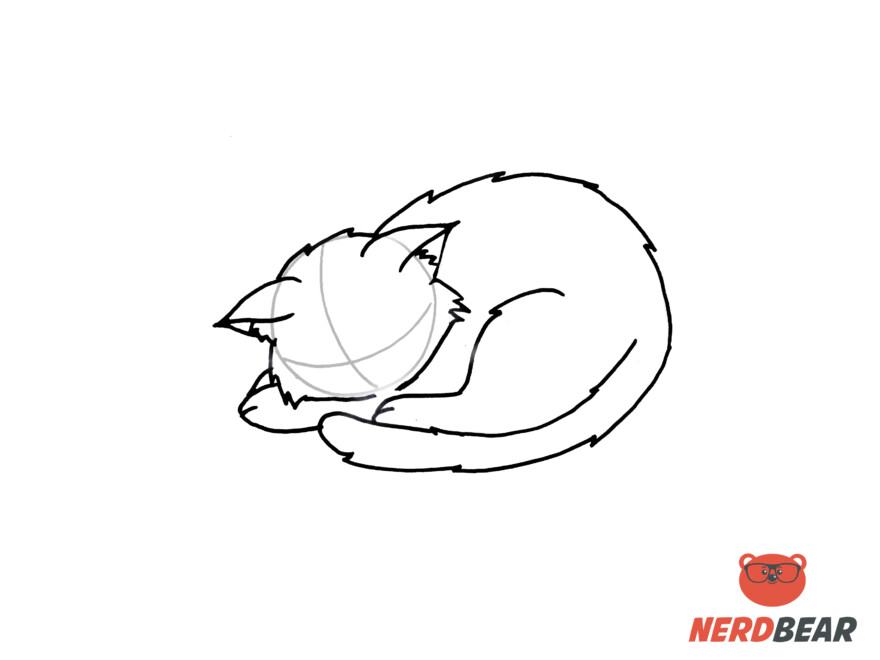
Start with a circle for the guideline of the cat’s head. Indicate where the cat will be facing by drawing a vertical and horizontal line. The horizontal line is for your cat’s eye line. The vertical line is to indicate where the middle of the face would be.
Step 2:
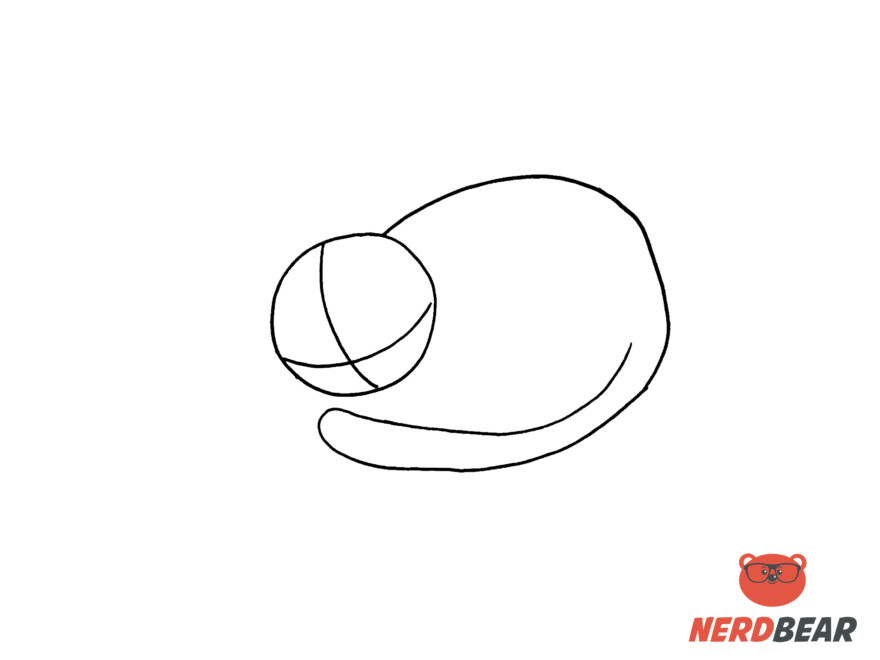
Draw an almost oval shape to create the body and tail of the cat.
Step 3:
Draw the back leg of the cat. Draw a circular curve for the thigh then add in the lower portion of the leg by continuing with a long oval shape.
Step 4:
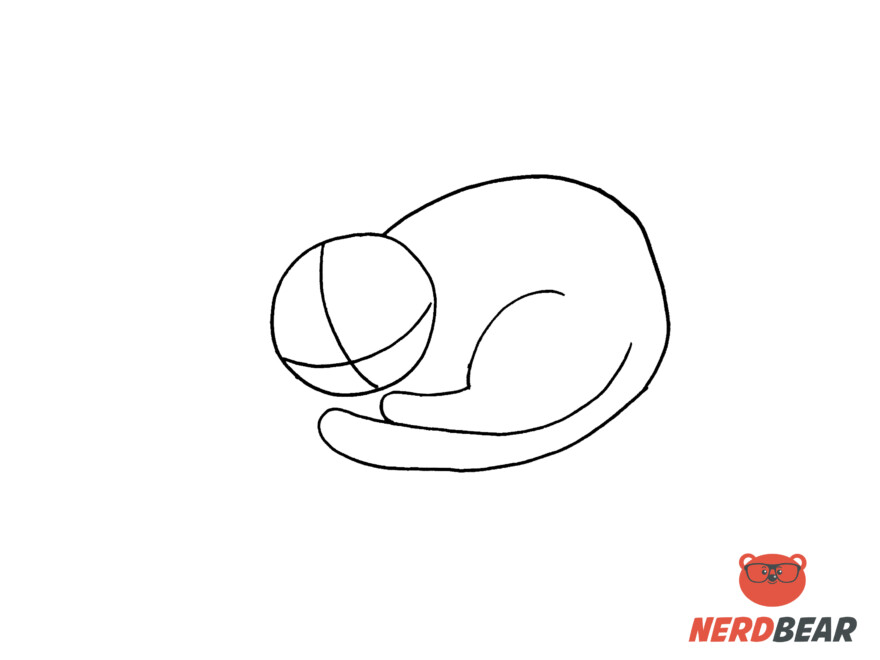
Add two overlapping oval shapes for the two front paws
Step 5:
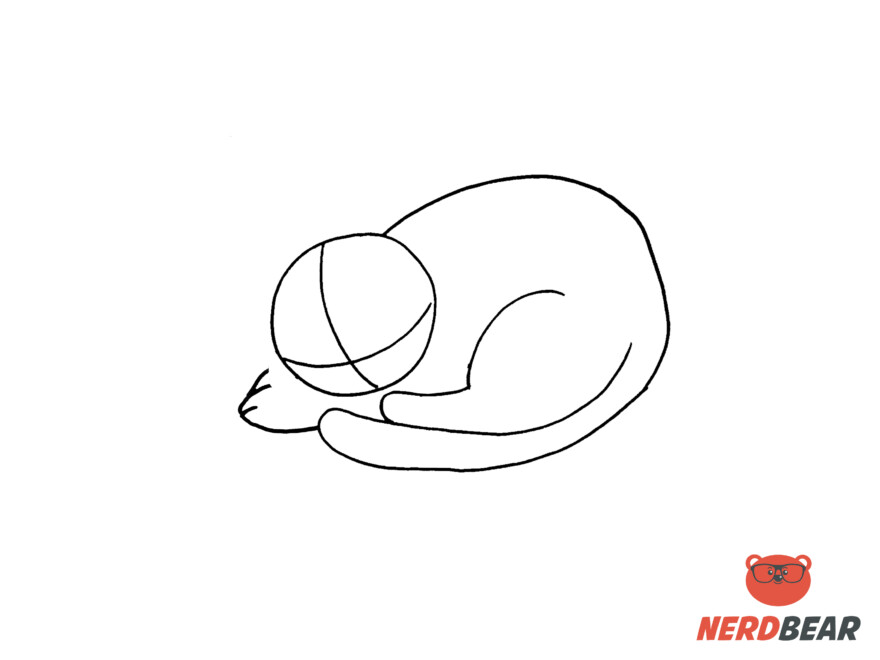
Finish the cat’s body by adding clumps of fur to the back and tail portion.
Step 6:
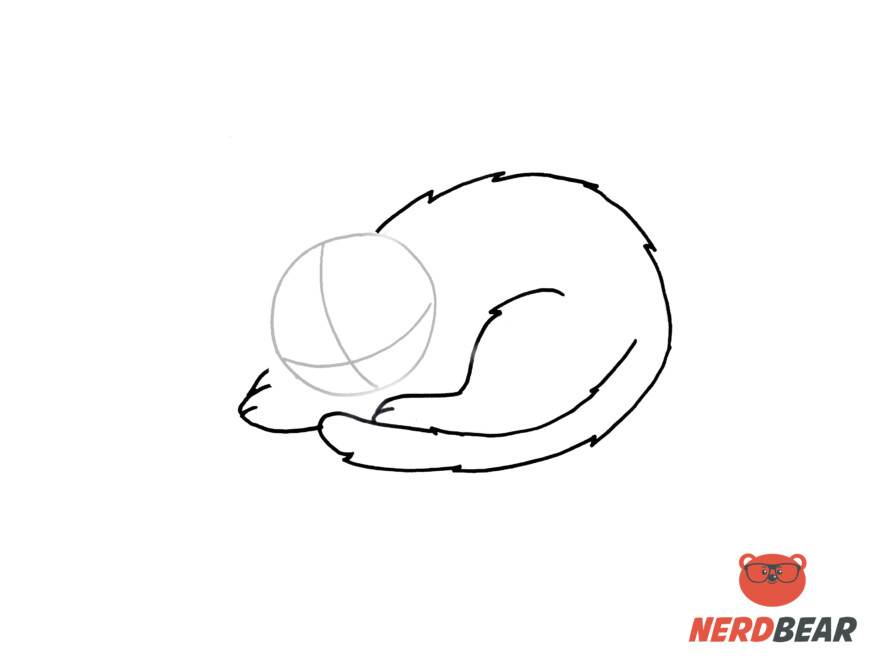
Draw the ears on top of the head guideline. Position the ears in a relaxed state by pointing them downward. Connect the ears with a curve line and add fur clumps to the top of the head if desired.
Step 7:
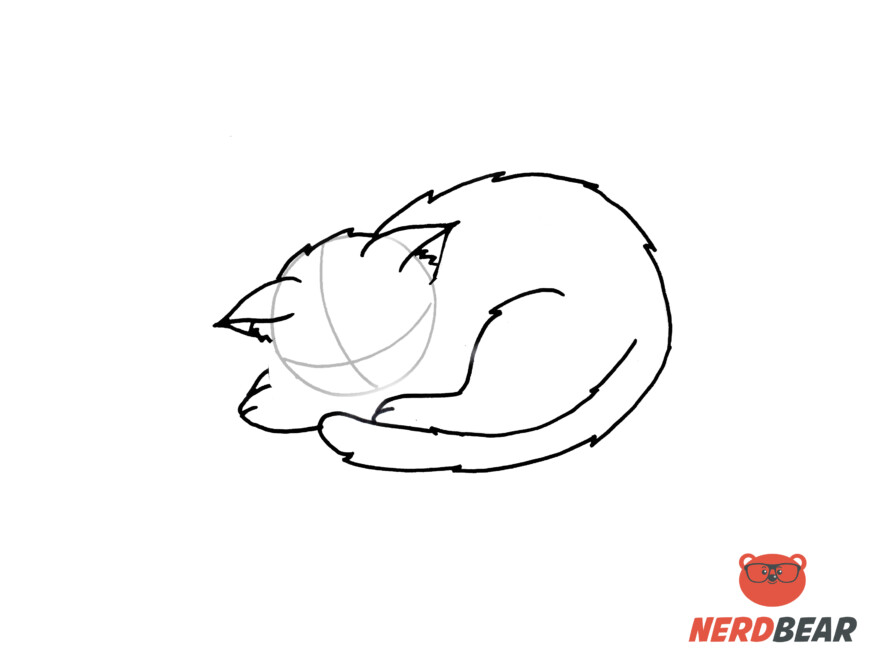
Add fur to the cheeks of the cat and finish up its face shape.
Step 8:
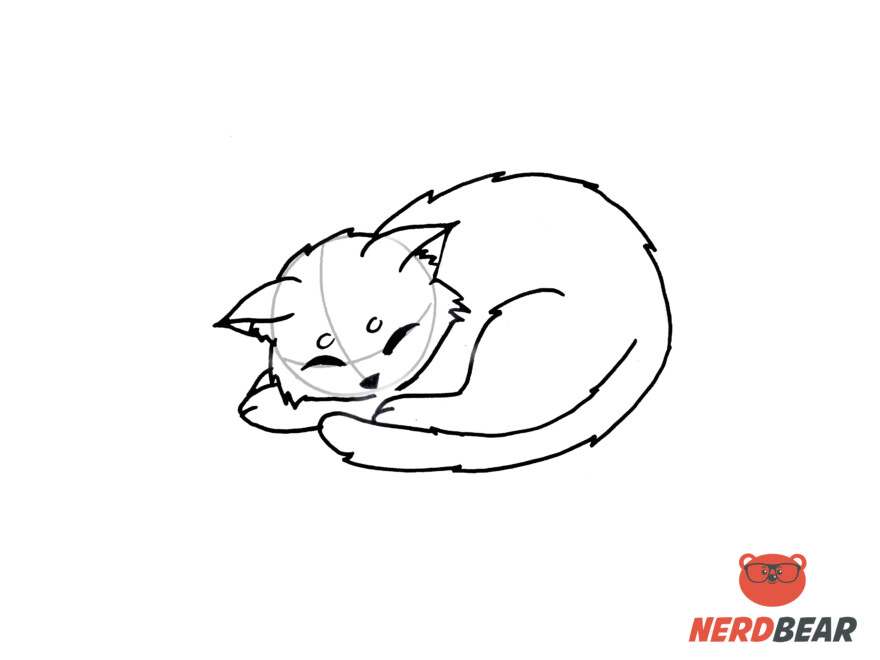
By using the face guidelines, draw the cat’s facial features.
Step 9:
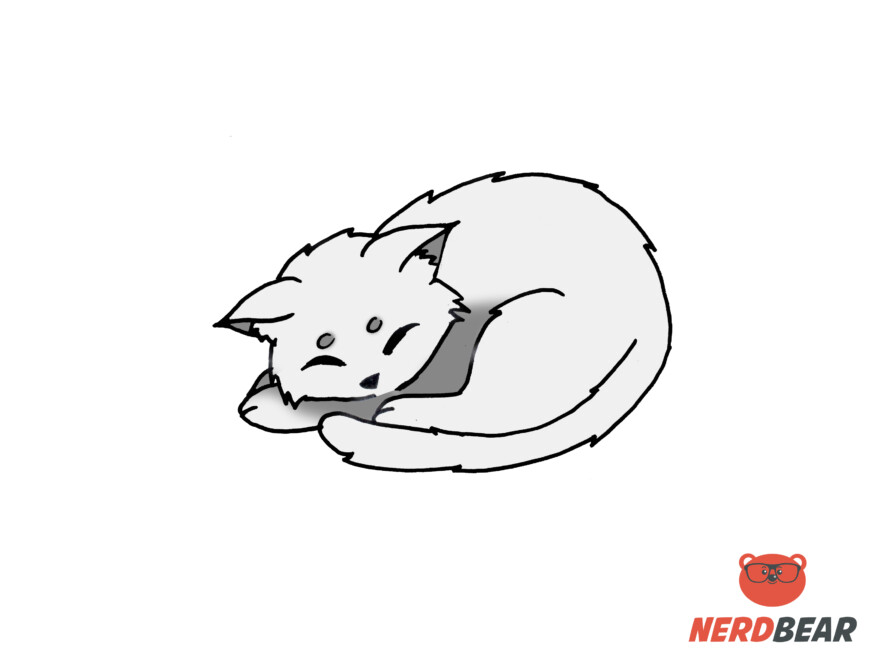
Finish the drawing and add in shade where necessary.
How To Draw an Angry Anime Cat
Step 1:
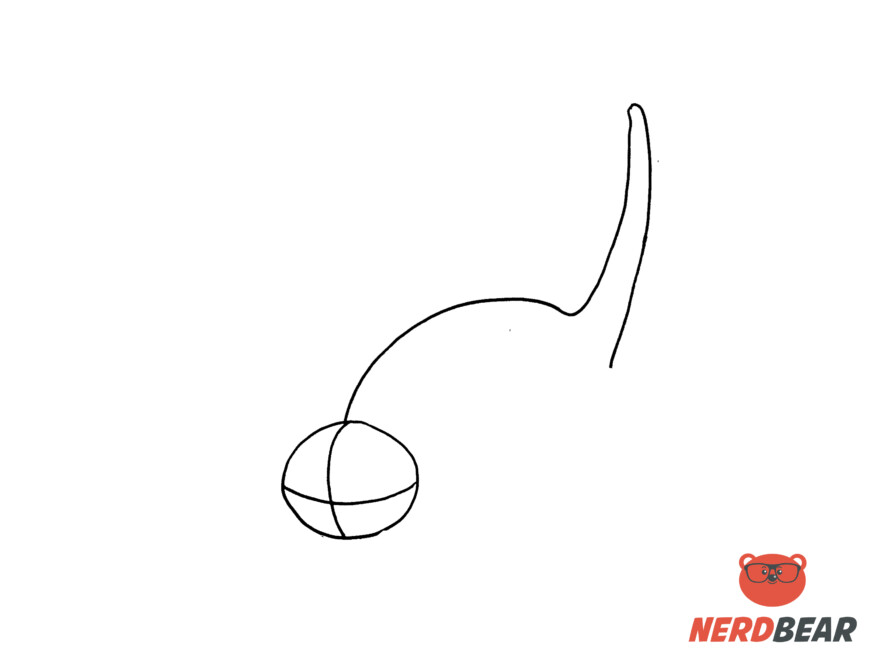
Create a circle for the cat’s head. Draw a vertical line within the circle to indicate the middle of the cat’s face. Draw a horizontal line within the circle for the eye line guide.

Step 2:
To draw the back line of the cat, create an arch. At the end of the arc add in the cat’s tail. To create an angry feel, point the tail up.
Step 3:
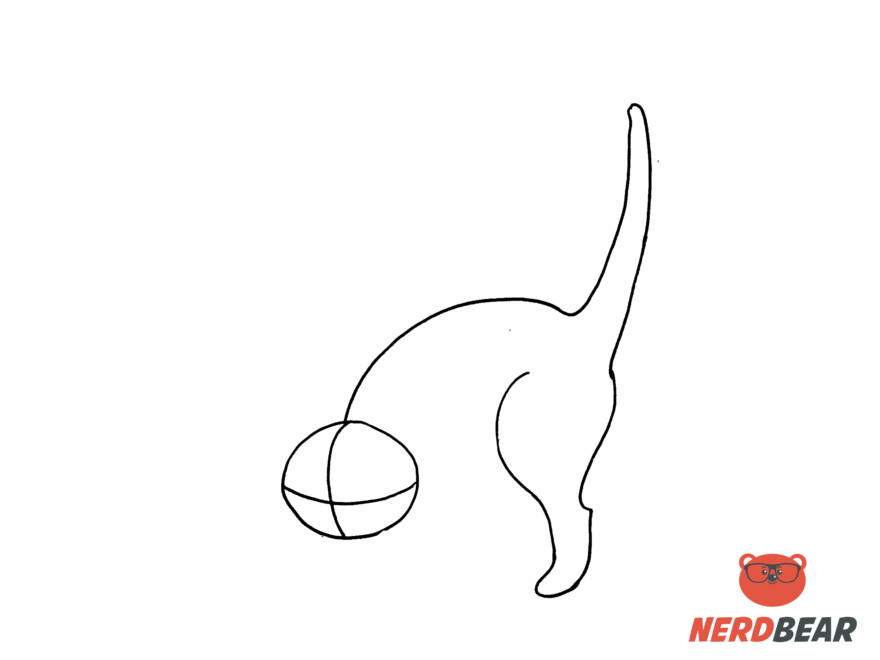
Draw the back leg of the cat. Draw a circular curve for the thigh then add in the lower portion of the leg and round the paw.
Step 4:
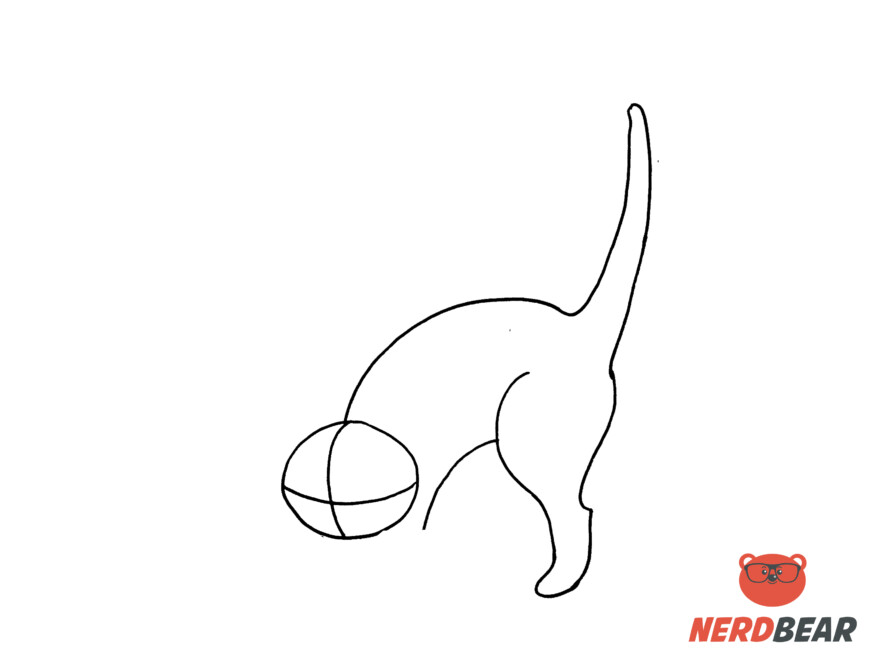
Create another arc parallel to the back arc you drew. This will serve as the cat’s belly line.
Step 5:
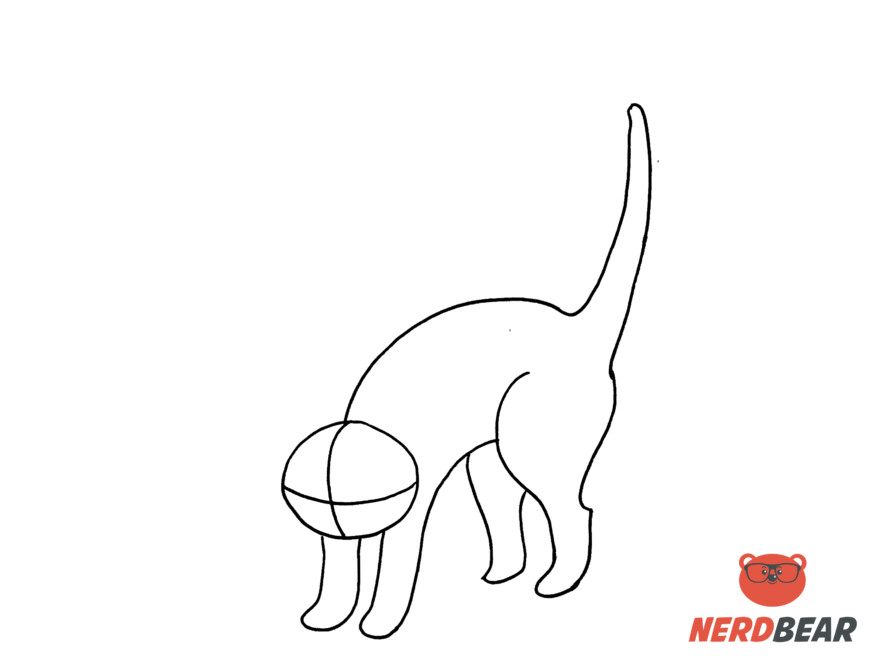
Add in the two front paws right next to each other. Draw in the other back leg by mirroring the first leg you drew.
Step 6:
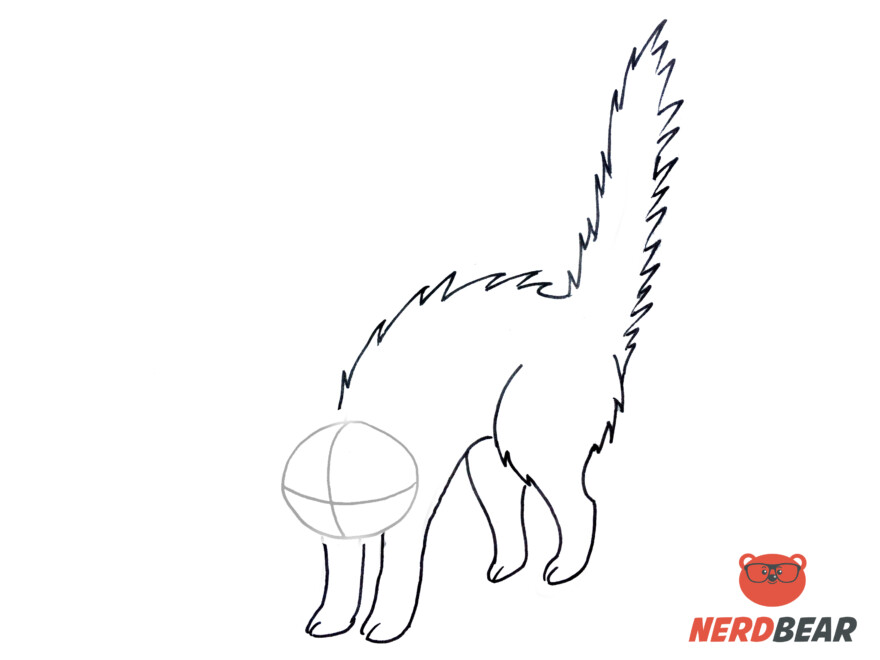
Finish the cat’s body by adding fur clumps around the back and tail part of the cat. Make sure to point the clumps up and out. Vary the size of the fur clumps to create a more natural look. Don’t forget to add a line to the middle of each paw.
Step 7:
Point the ears towards the cat’s back to make an angry expression.
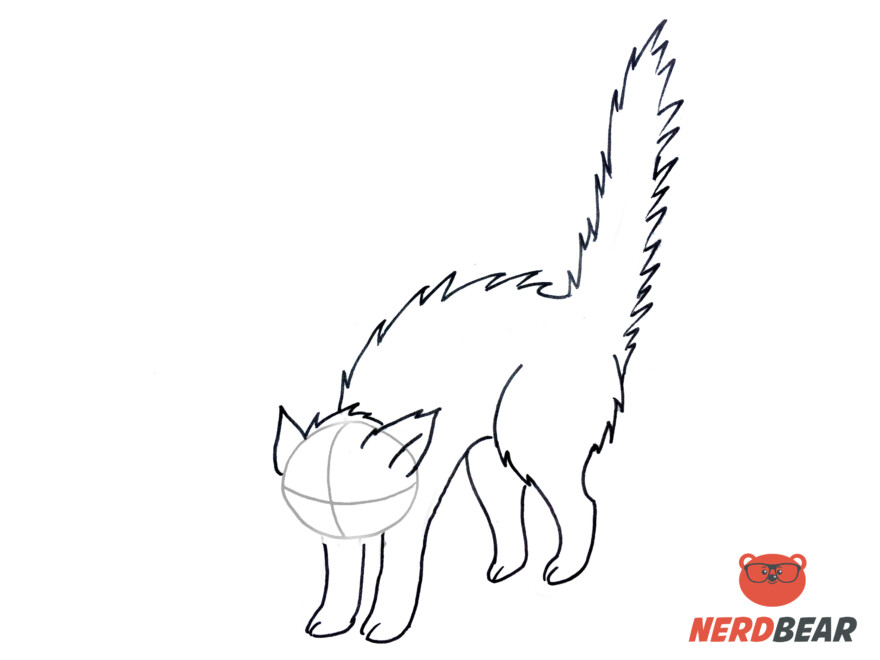
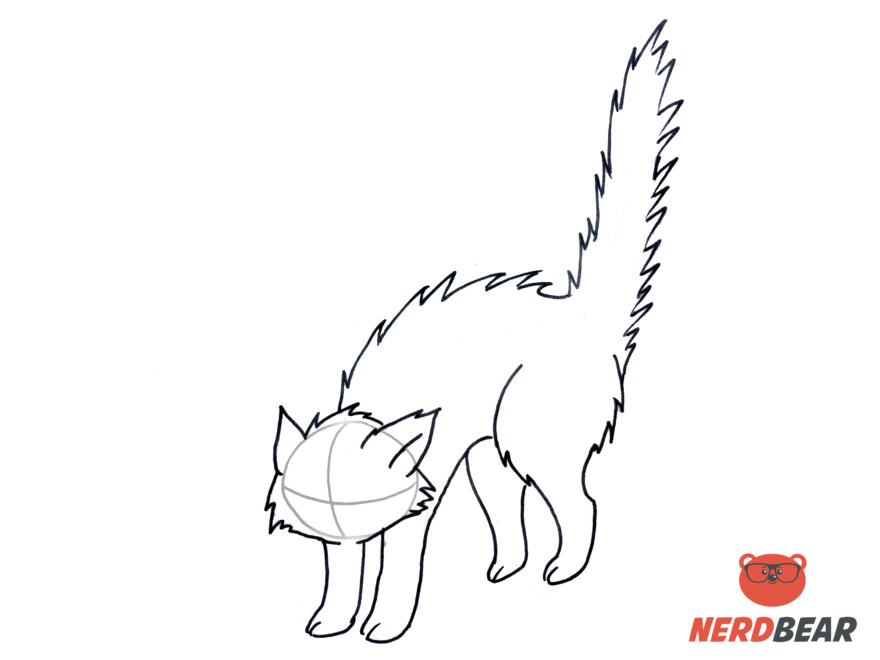
Step 8:
Add extra fur to the cheeks of the cat to change up its face shape.
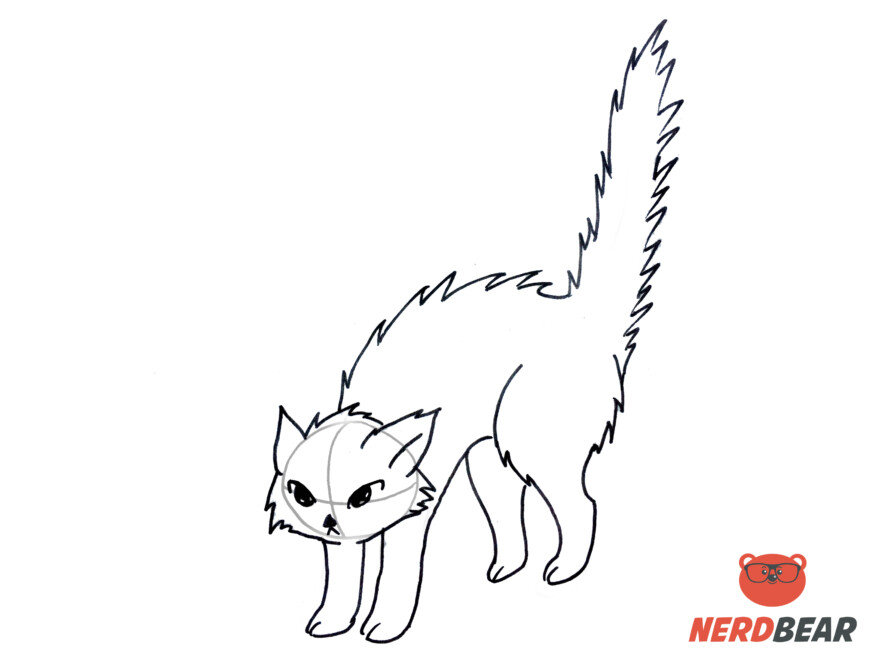
Step 9:
Create the cat’s facial features by following the facial guidelines. Add the nose below the intersection of the horizontal and vertical guide. Add a little upside-down V shape just below the nose, this will serve as the cat’s mouth.
Step 10:
Remove any guidelines that were left and finish the drawing by adding shadows and shades where necessary.
