![How To Draw Anime Hands [Poses, Fists & More]](https://nerdbear.com/wp-content/uploads/2021/05/How-to-Draw-Anime-Hands.jpg)
In this tutorial, we’ll teach you step-by-step how to draw anime hands from different points of view.
By following all these simple steps you’ll be drawing perfect hands in no time. Just remember: the more you practice, the better you’ll get.
Quick Links
How To Draw Anime Hands
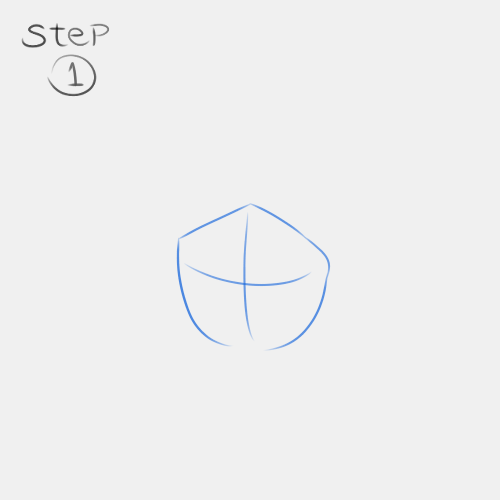
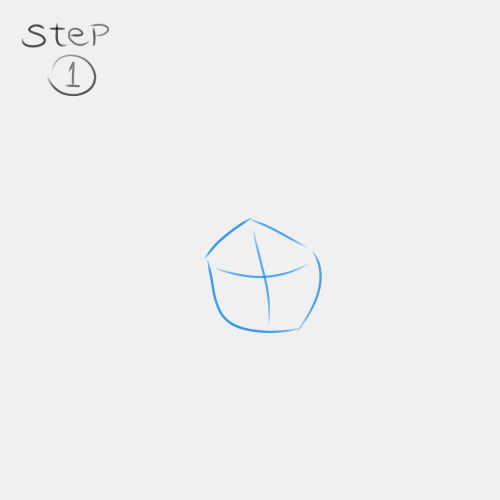
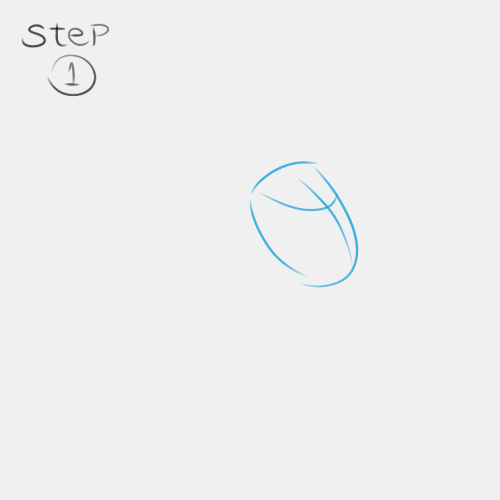
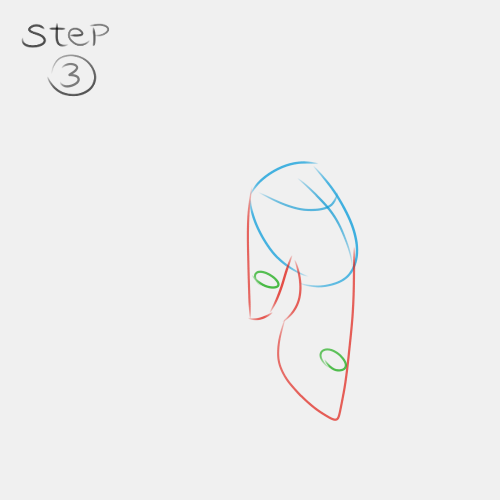
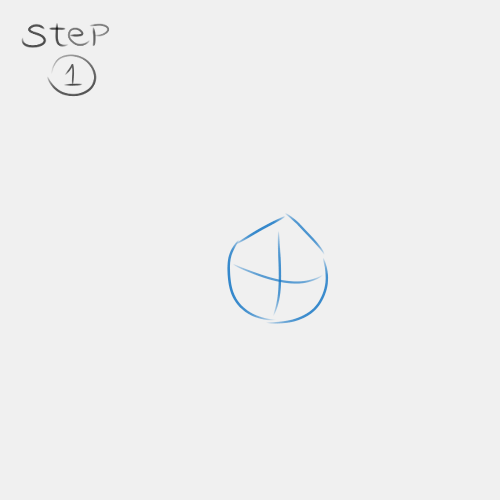
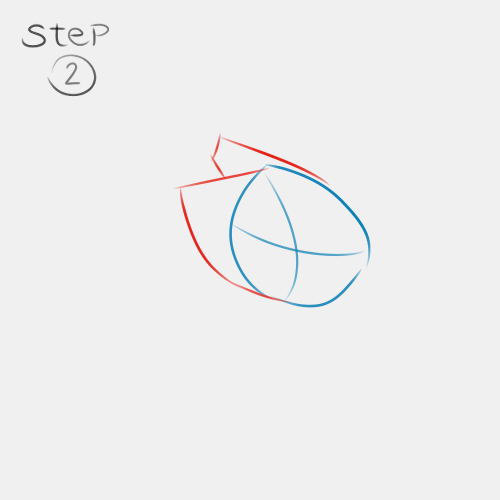
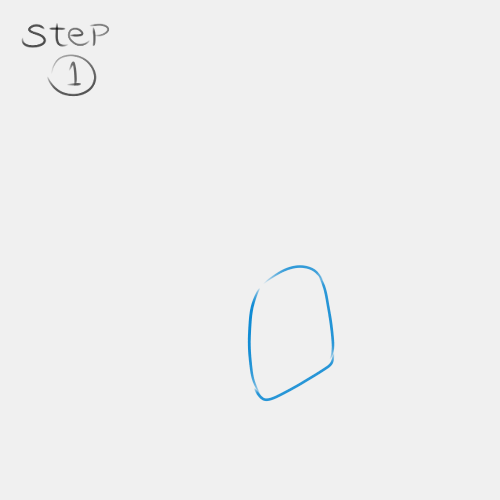
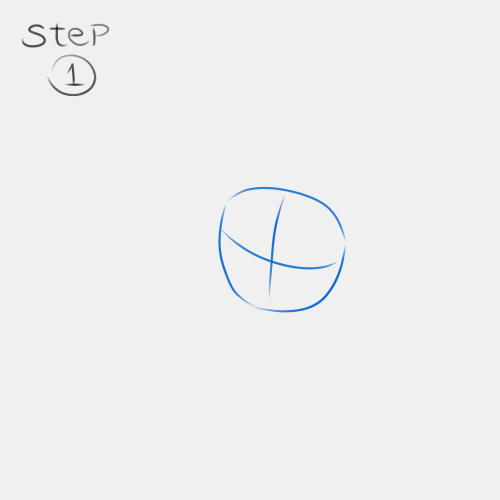
Start with a semi-circled shape and an open triangle on top.
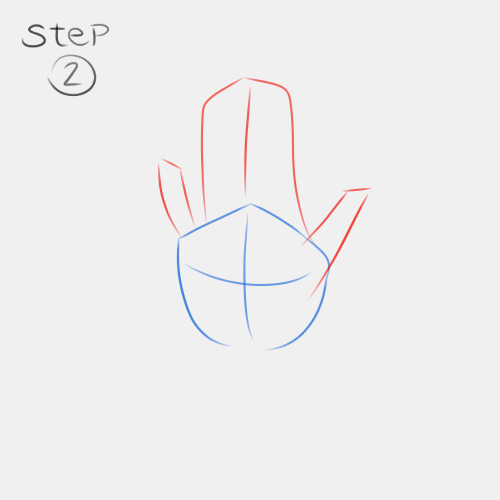
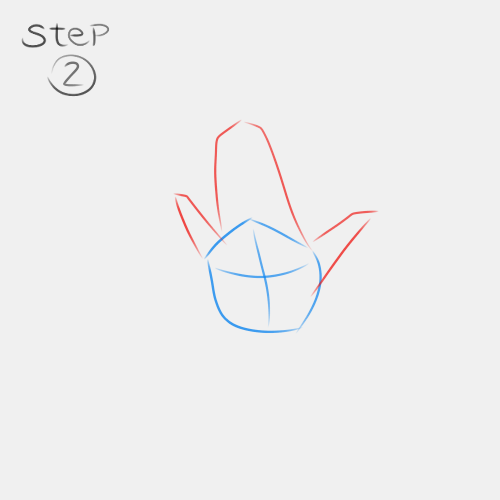
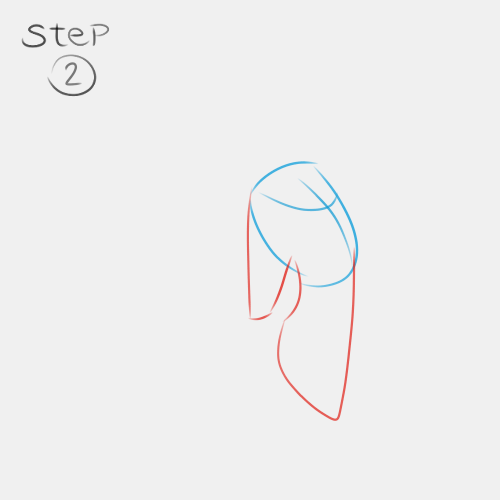
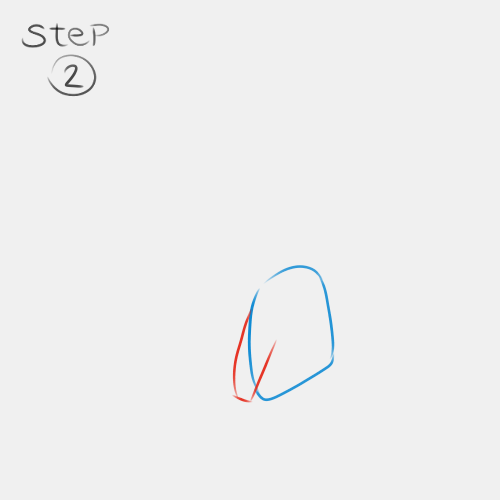
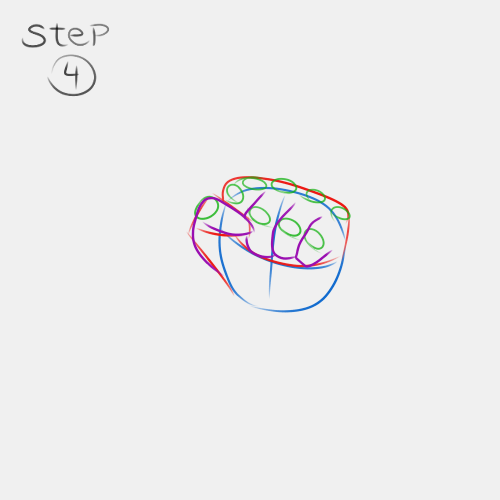
Insert two rectangles at the ends and a larger one in between (they don’t have to be perfect, so don’t worry). The two smaller ones are Thumb and Pinkie, the other three are going to be kept closer, so that’s why we’re not separating them into different shapes.
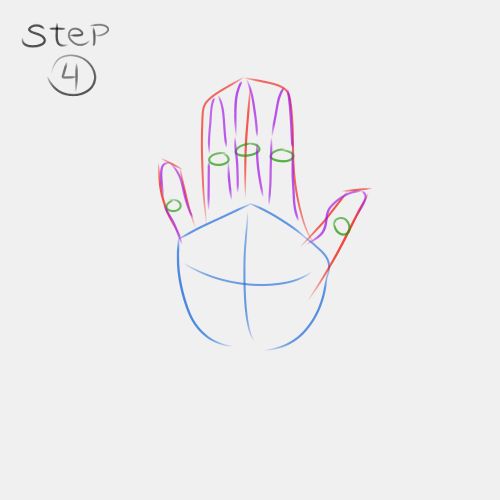
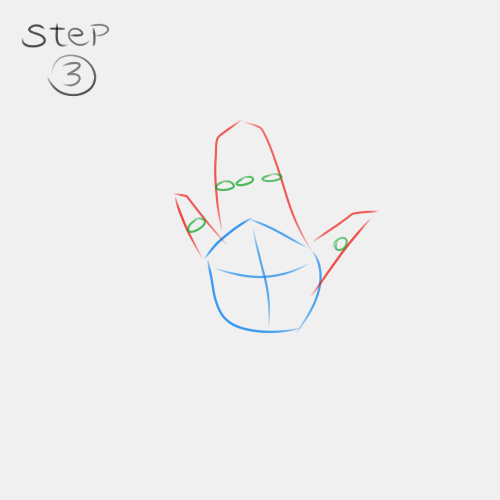
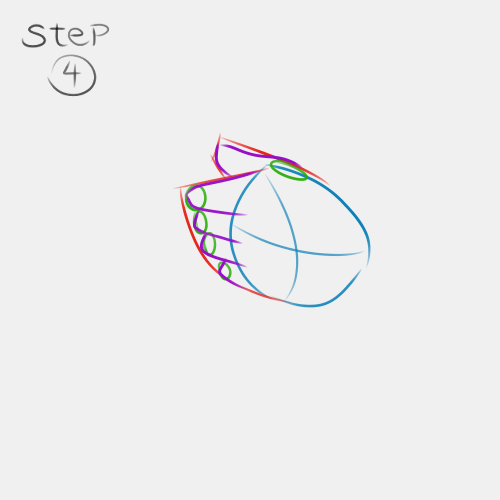
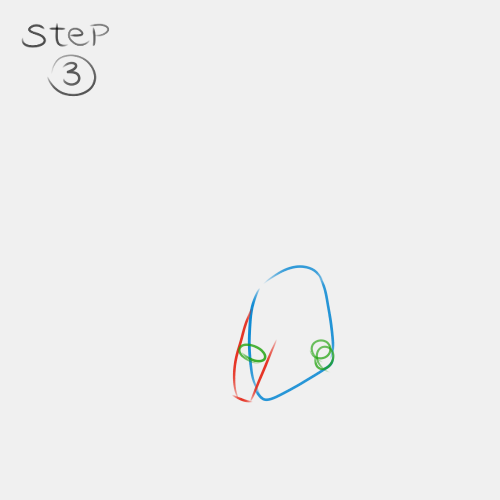
Draw small circles where the main joints should be. It’s a simple trick that will help you with the anatomy part.

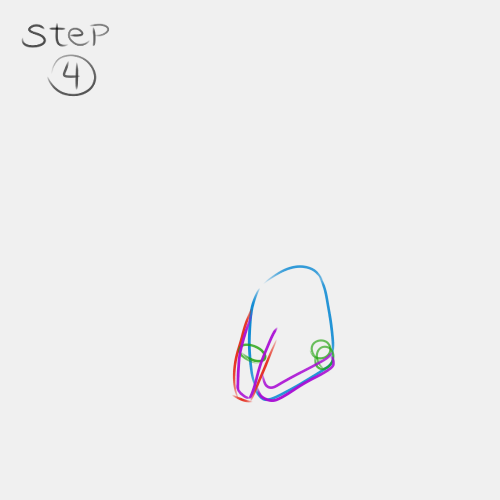
After that, start drawing the fingers. Try to make two separated lines between the joints, this will bring fluidity to your drawing in an easier way than continuous ones.
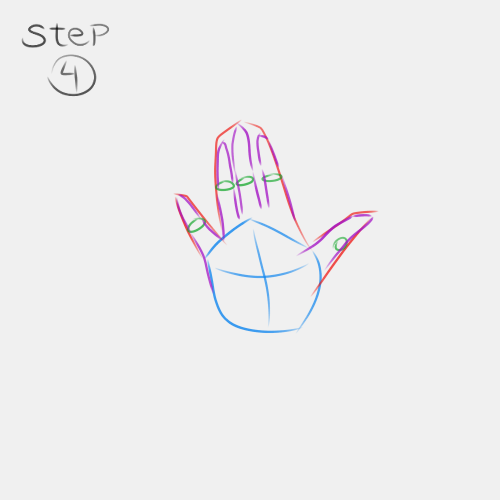
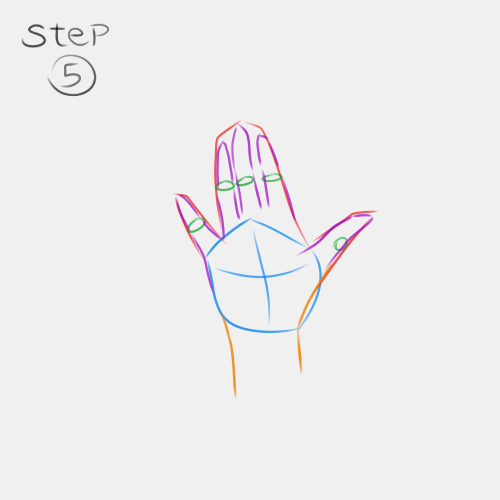
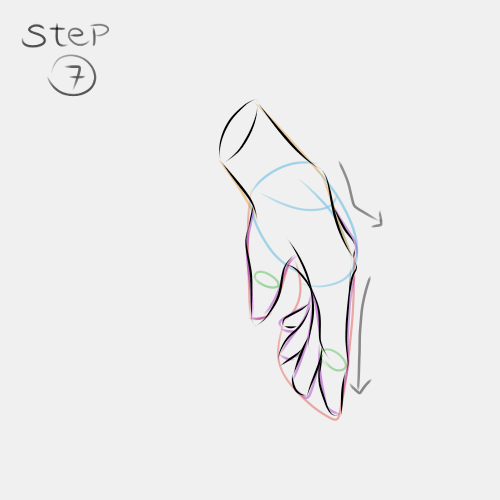
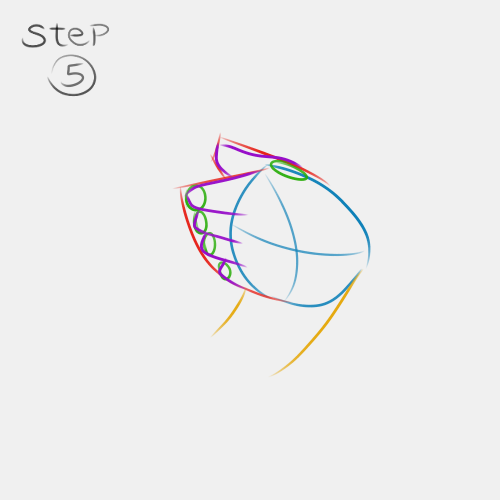
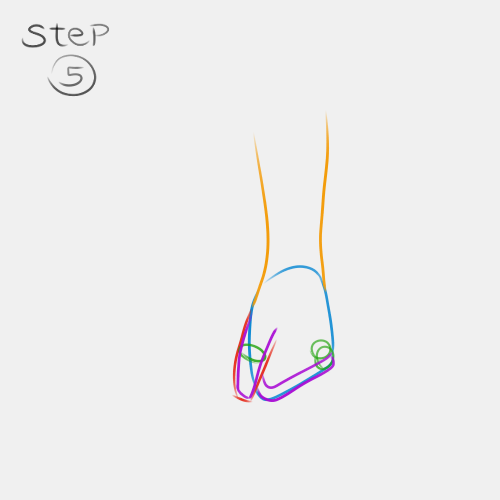
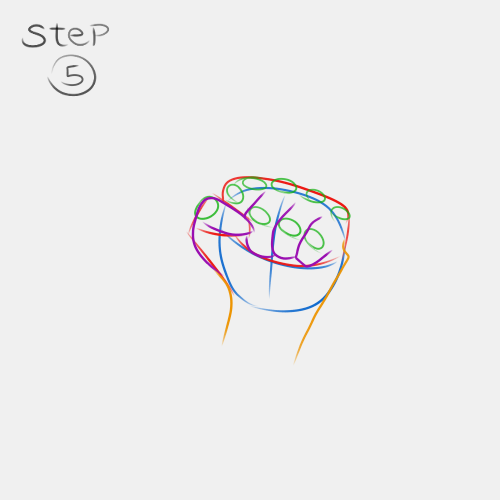
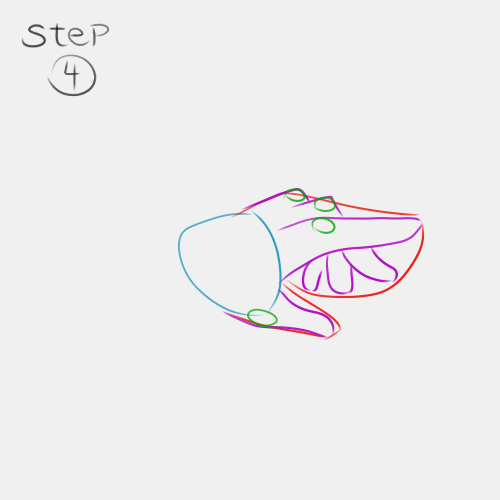
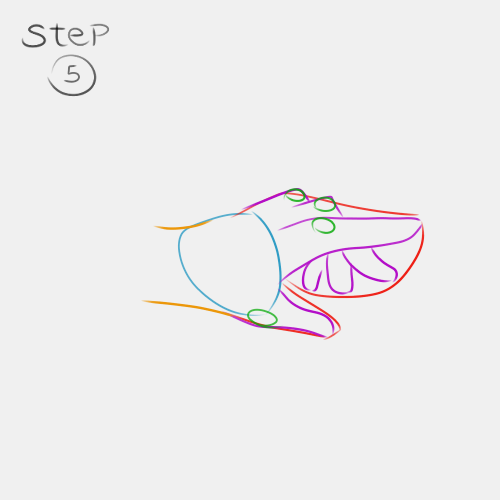
To finish the sketch: lengthen the lines for the wrist.
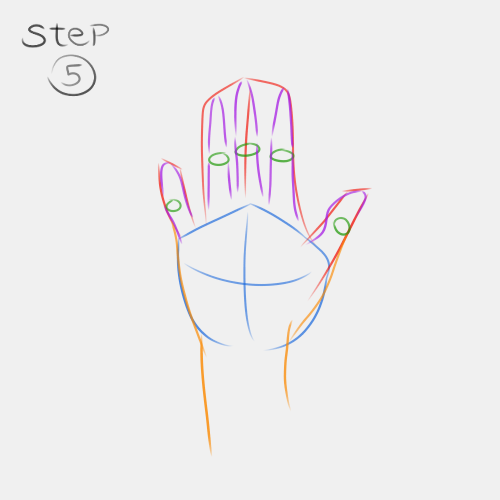
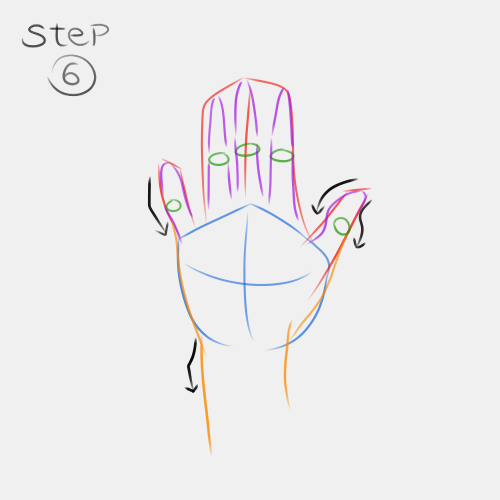
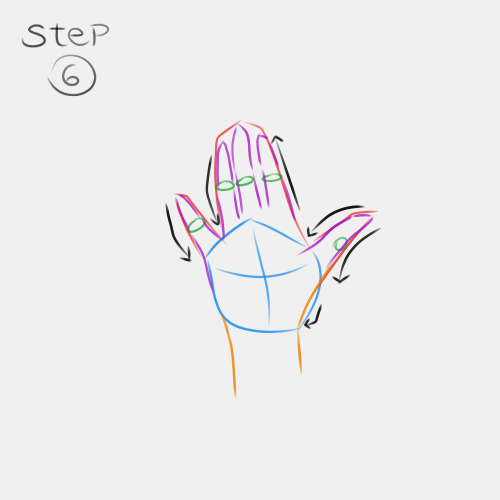
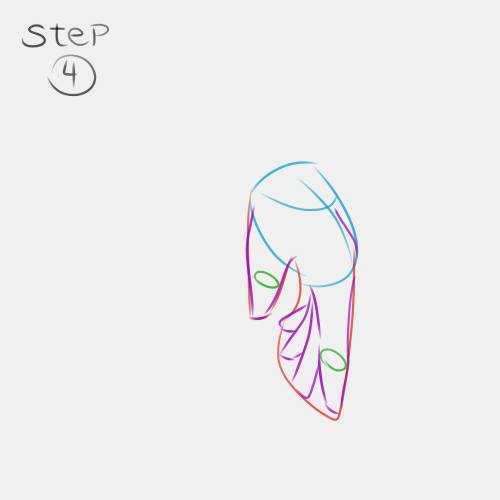
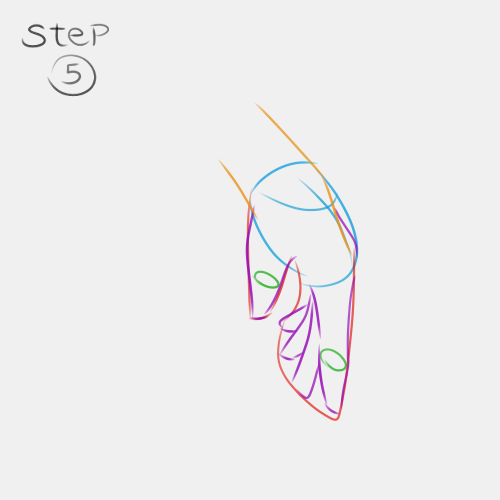
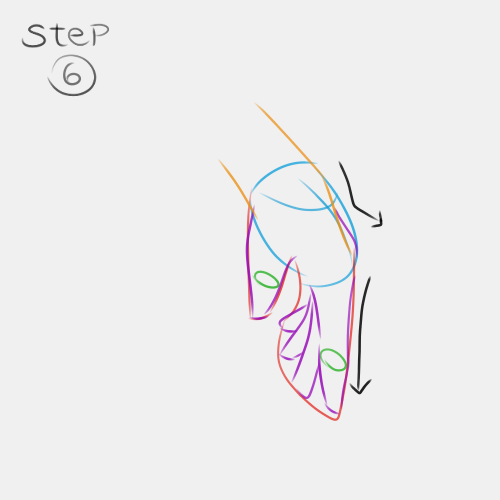
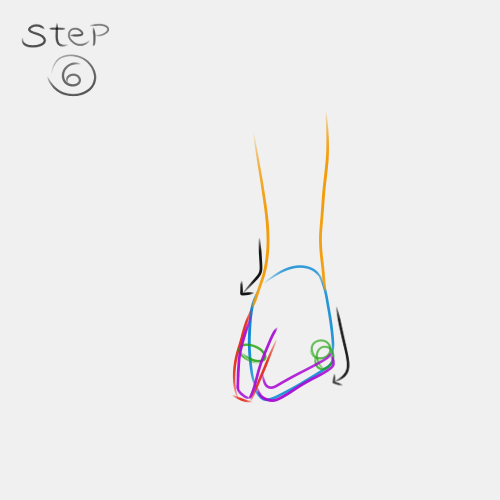
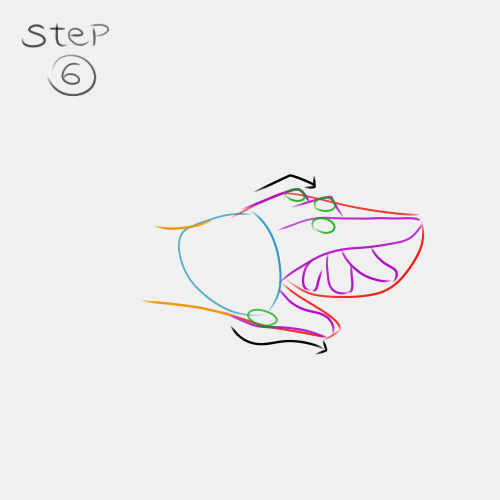
There are a couple of tricky lines that you should pay attention to, so use the arrows to guide them.
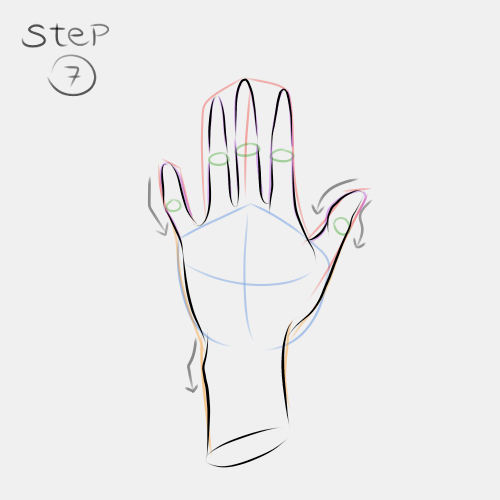
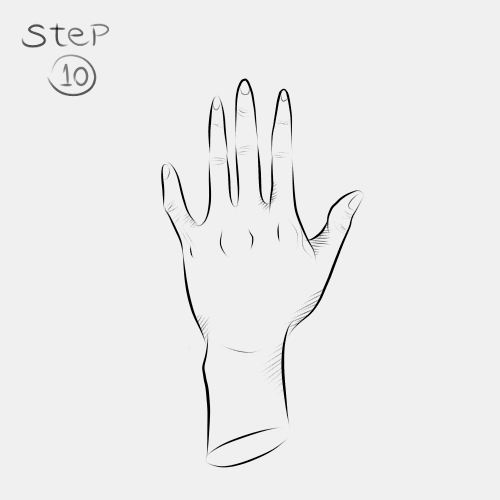
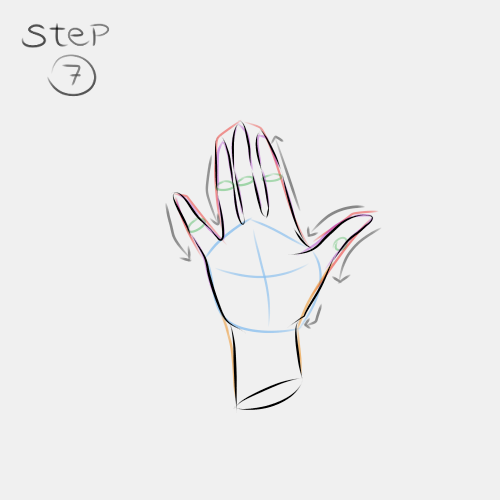
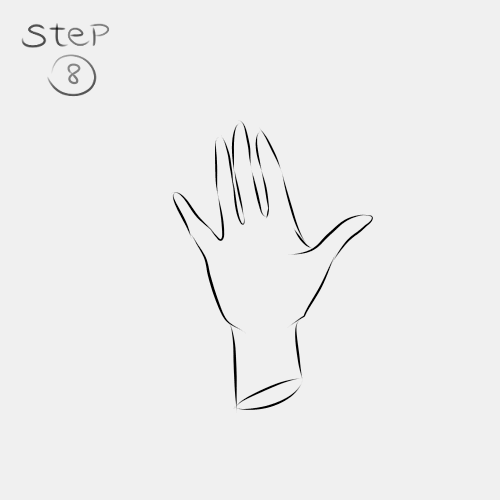
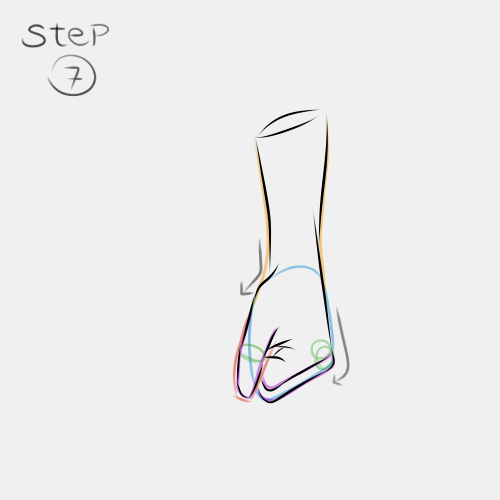
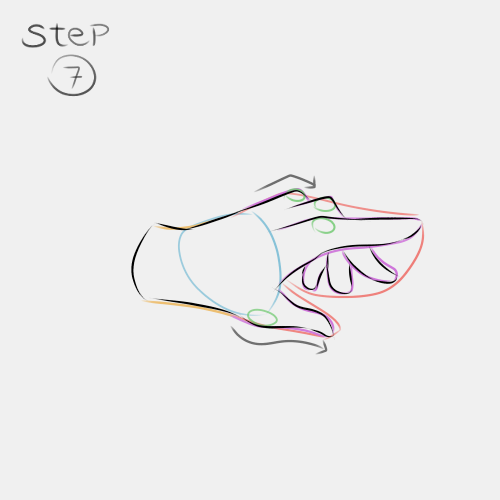
Outline all the important traces of the sketch.
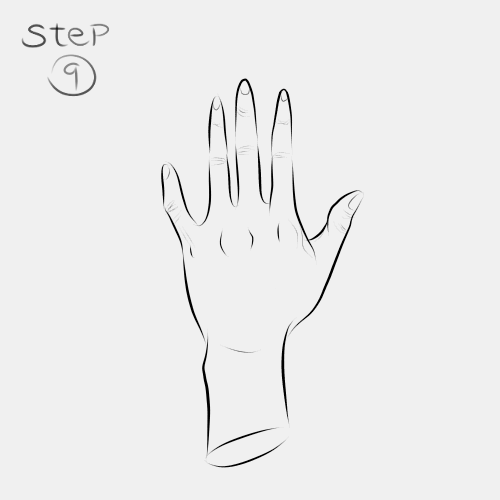
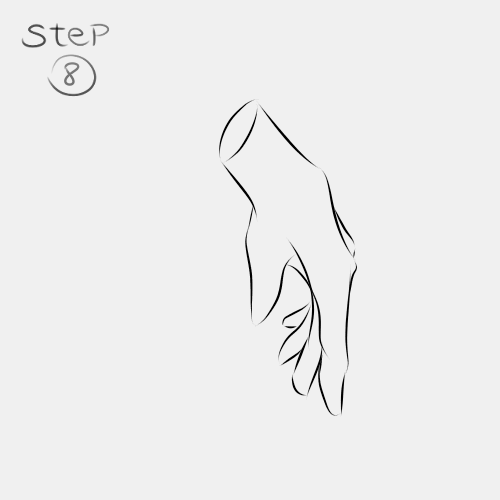
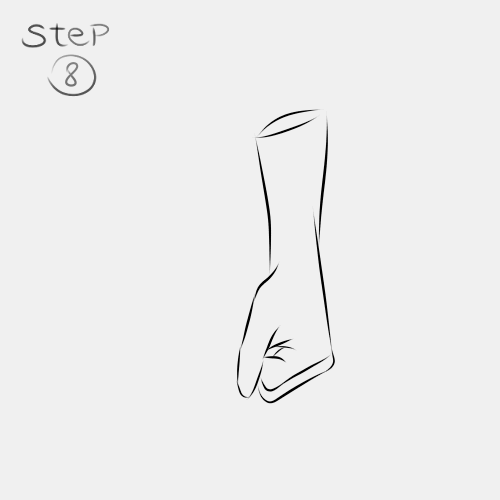
Clean the sketch keeping the main lines (that’s your Lineart).

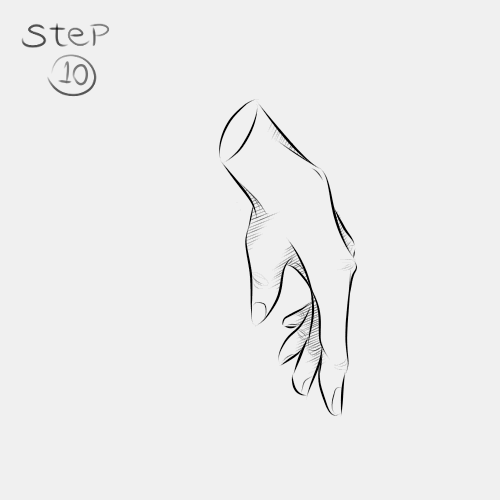
Add details such as lines and wrinkles. You can use your own hand to observe where they are and their shapes.
For better results add shadows. There are many different kinds of shadows when drawing anime/manga, you can use the one you prefer. In this case, we are using lines as a shadow method.
How To Draw an Anime Hand – Palm View
Just as the first drawing, start with a semi-circle shape and an open triangle on top.
Add two rectangles at the ends and a larger one in between, but this time remember they’re going to be in inverted positions in relation to the previous drawing.
Draw small circles where the main joints should be. Also, remember the position of each finger (if there is rotation or not, etc.) After all, not all of the circles are going to be in the same place.
We are keeping the same method as the previous one: make two separated lines between the joints to bring fluidity to your drawing. Remember that not all the lines are straight, so pay attention to the curves.
To finish the sketch: lengthen the lines for the wrist.
Use the arrows to guide you once again. The most important part of this drawing are the fingers and the shape you give to them, so pay attention to that.
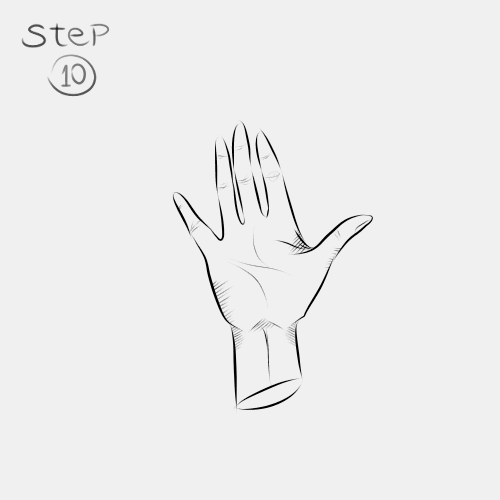
Outline all the important traces of your sketch.
Clean the sketch keeping a clean Lineart.
Add details such as lines and wrinkles. Don’t forget to draw palm lines!

For better results, add shadows to give dimension.
How To Drawn an Anime Hand – Side View
Star with an oval shape. That’s the palm shape.
Add a rectangle on left termination of the shape (that’s the Thumb) and another structure for the other four fingers. Start with a bigger form that decreases as approaching the center of the drawing (from right to left).
Draw small circles where the main joints should be. In this drawing, not all of the joints are showing, so there are going to be only two.
Start drawing fingers following the shapes you already have.
To finish the sketch: lengthen the lines for the wrist.
Use the arrows to help you with the hand’s bone structure. I think that’s the trickiest part.
Outline all the important traces of your sketch.
Clean the sketch keeping a clean Lineart.
Add details such as lines and wrinkles, and nails.

For better results, add shadows to give dimension, especially on the three fingers past the index finger.
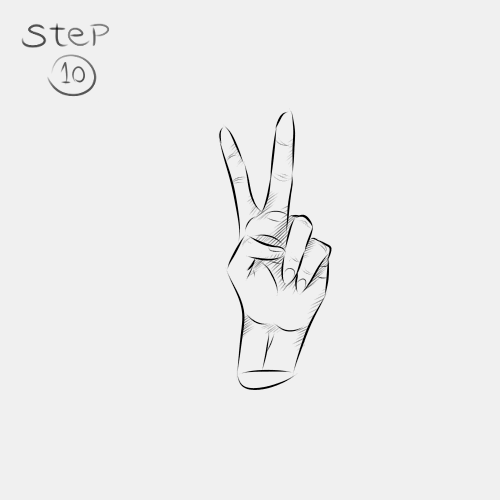
How To Draw an Anime Hand Doing the Peace Sign
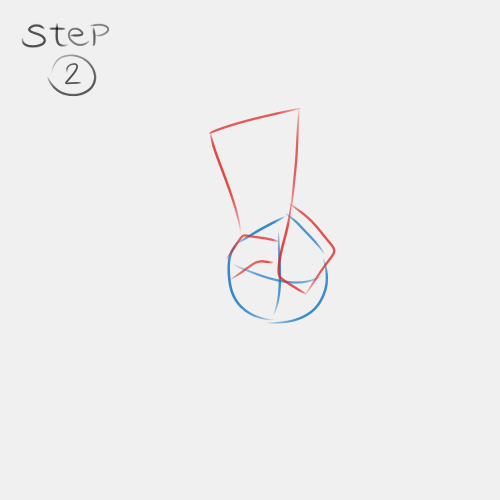
Once again, start with a semi-circle shape and an open triangle on top.
Draw three forms: one in L shape, another one similar to a triangle (but no need to connect both sidelines, and, for last, a rectangle.
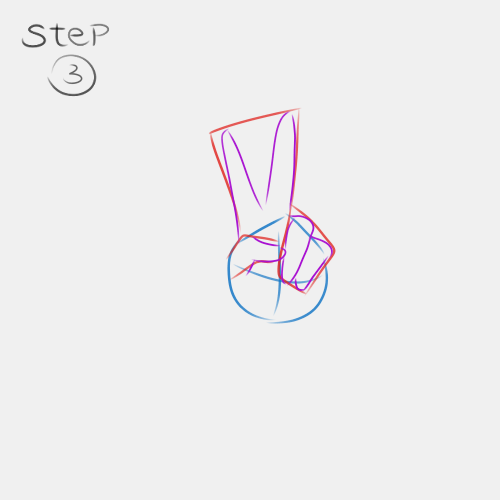
Start drawing fingers this time (before the joints). In this case, that’s the easier way because of the big gap between the fingers.
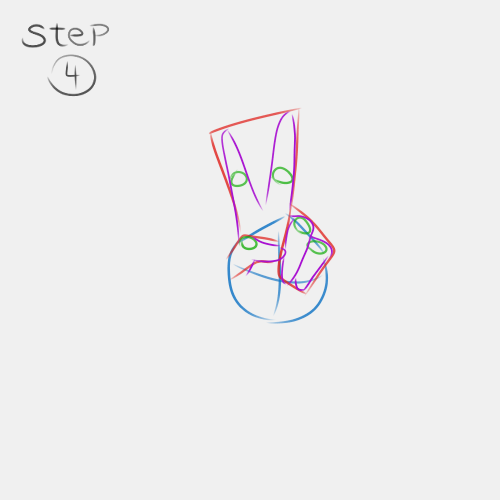
Now add the joints.
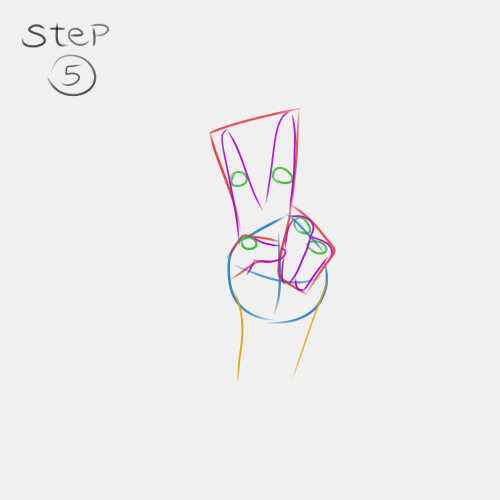
To finish the sketch: lengthen the lines for the wrist.
Use the arrows to help you with the Thumb (if needed).
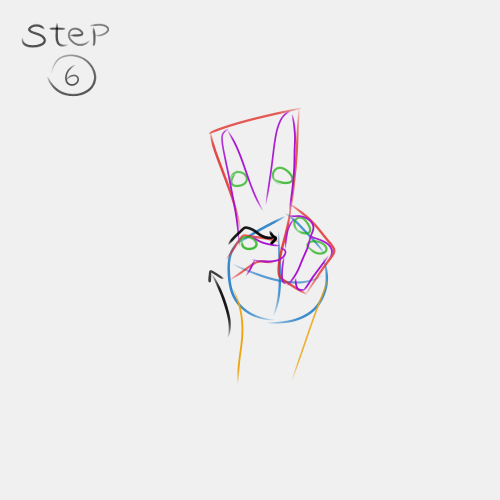
Outline all the important traces of your sketch.
Clean the sketch keeping a clean Lineart.
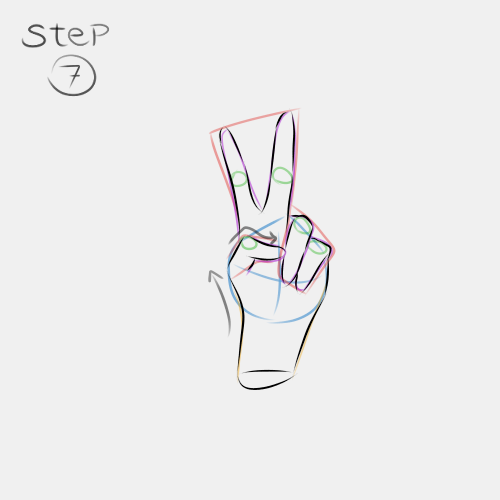
Add details such as lines and wrinkles. Again: don’t forget to draw palm lines! They’re really important for any type of hand palm drawing you’ll do.
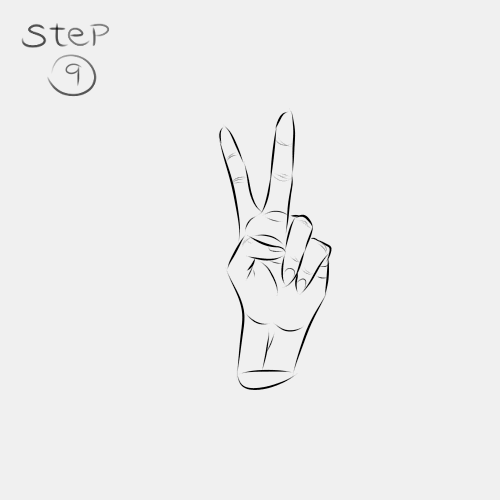
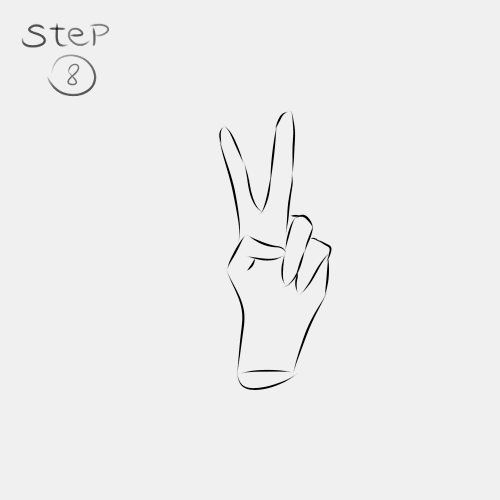
For better results, add shadows, especially under the three-down fingers.
How To Draw an Anime Fist – Back View
Start with a circle.

Add two shapes: a rectangle and a descending one.
Draw small circles where the main joints should be. Pay attention to the position of the Thumb. The other ones are going to be next to each other (in a descending line).

Draw fingers paying attention to each’s form.
To finish the sketch: lengthen the lines for the wrist.
Use the arrows to help you shame each finger and the wrist part.
Outline all the important traces of your sketch.
Clean the sketch keeping a clean Lineart.

Add details such as lines and wrinkles.
For better results, add shadows to give dimension.
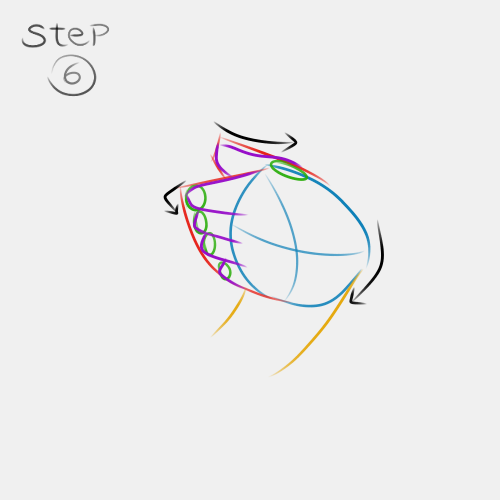
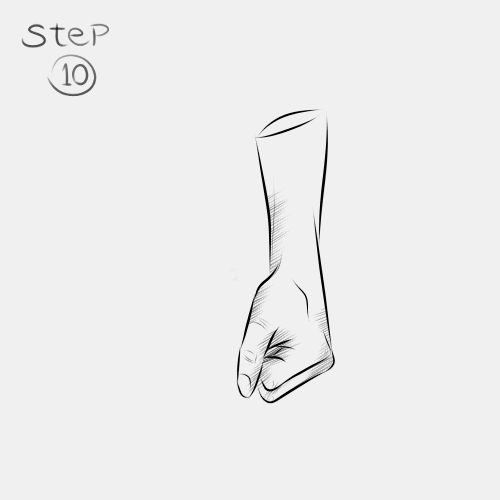
How To Draw an Anime Fist – Side View
Draw a shape following the structure of a closed fist. You already including the fingers.
Add a rectangle of the Thumb. And the three showing joints.
Follow the already existing shapes for drawing fingers (remember only three are showing).
To finish the sketch: lengthen the lines for the wrist.
Follow the narrows for the wrist.
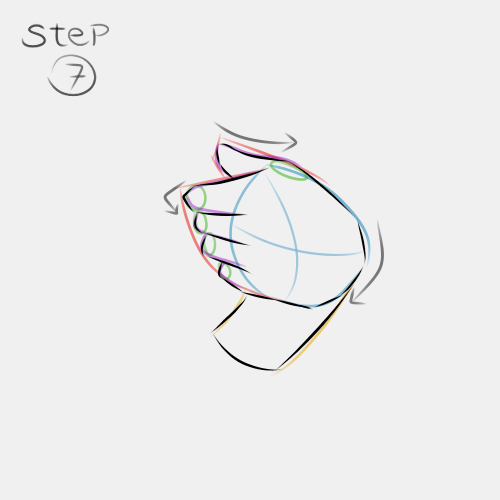
Outline all the important traces of your sketch.
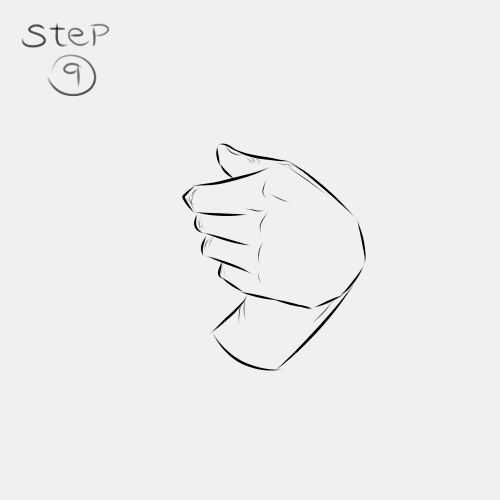
Clean the sketch keeping a clean Lineart.
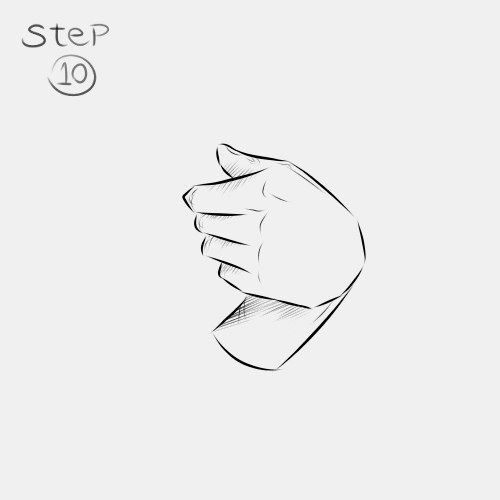
Add details such as lines and wrinkles. Don’t forget to draw palm lines!

For better results, add shadows to give dimension.
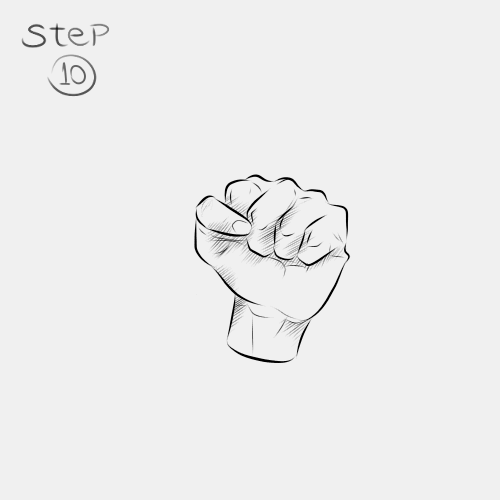
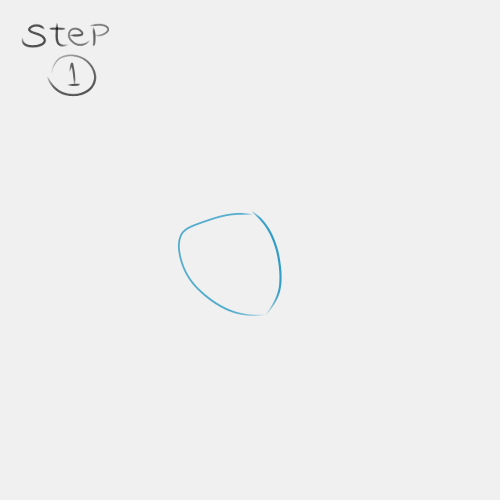
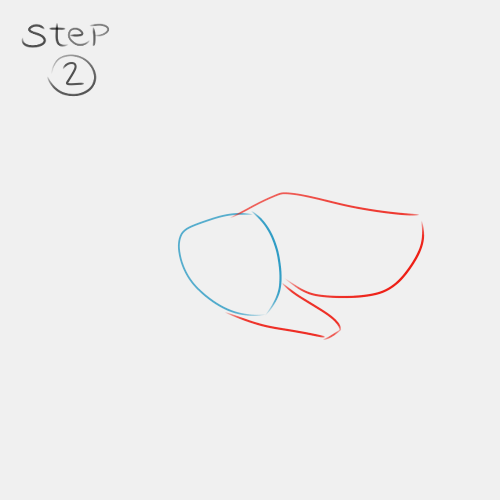
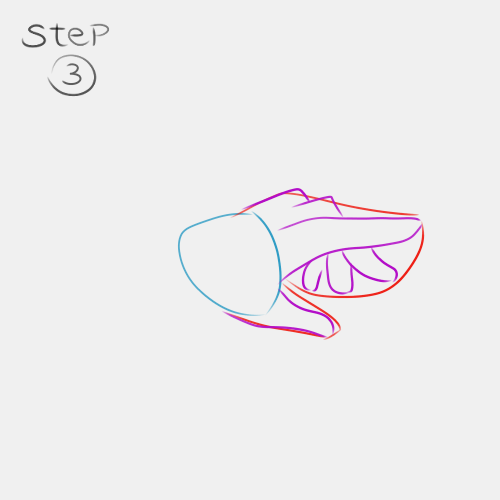
How To Draw an Anime Fist – Front View
Start with a circle shape and an open triangle on top.
Add one big rectangle for the four fingers and another shape for the Thumb.

Start with drawing finger shapes this time. Remember, we’re not fully showing the four fingers.

Add the joints. For this type of sketch is better if you draw as many as you can, not only the main ones. It will give structure to your drawing.
To finish the sketch: lengthen the lines for the wrist.
Use the arrows to guide you once again. Pay attention to the upper joints and that little fold on the right.
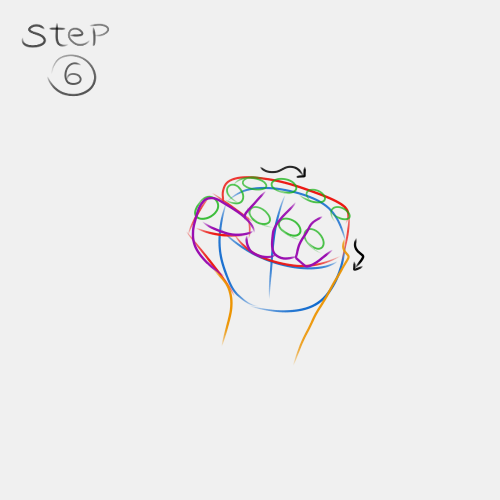
Outline all the important traces of your sketch.
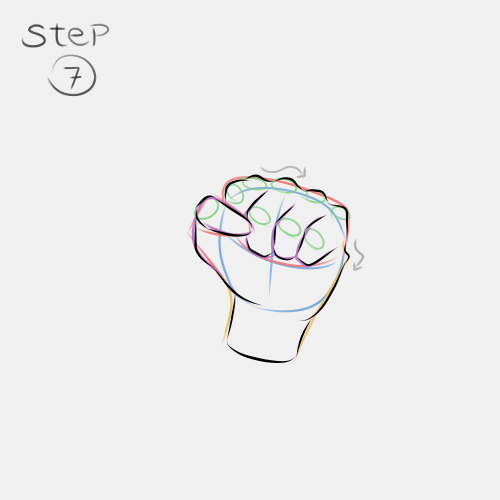
Clean the sketch keeping a clean Lineart.
Add details such as lines and wrinkles. Don’t forget to draw palm lines and the wrinkles that happen to your hand palm when you press your fingers against it.
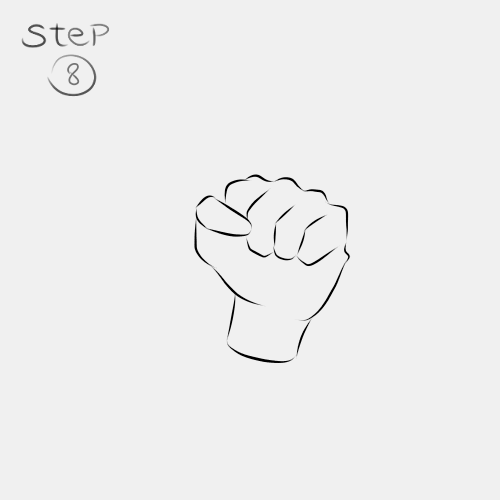
Add shadows for better results.
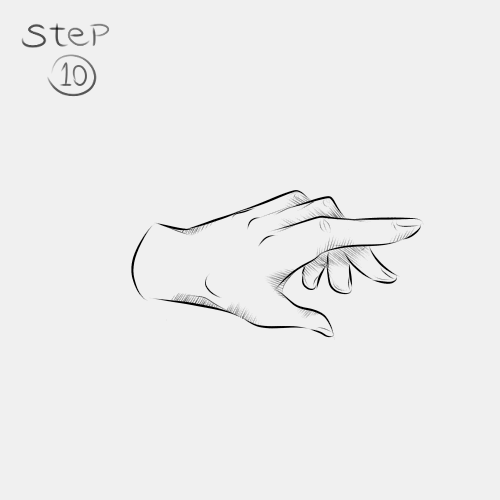
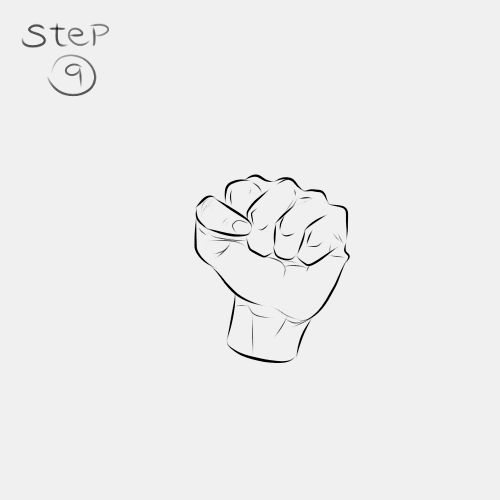
How To Draw an Anime Hand Pointing
Start with the palm shape.
Add a rectangle (Thumb)and a descending form (for the four other fingers).
Draw fingers following the shapes you already got.
Draw the joints, this time, only four are showing.
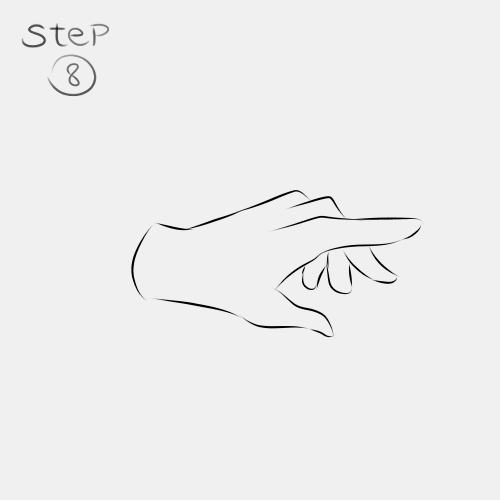
To finish the sketch: lengthen the lines for the wrist.
Use the arrows to help you with two of the joints and the Thumb’s curve.
Outline all the important traces of your sketch.
Clean the sketch keeping a clean Lineart.
Add details such as lines and wrinkles. Don’t forget the other joints (that we didn’t draw on the sketch, but they are there!). It will help your drawing to look more realistic.
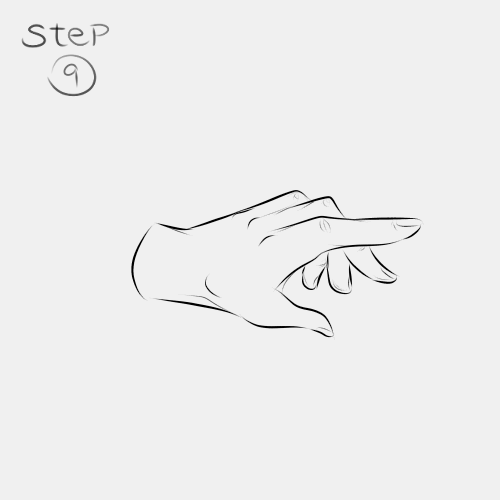
Add shadows where necessary.